53. Authoring a Decision
Let's author a simple decision and test it.
The use case we'll try out is the automation of a repeated decision for requests approval.
53.1 Create a new Decision
In the project we've just created:
-
Select the folder where you want to create the new file. Click on
resources. Next, click on the new folder icon: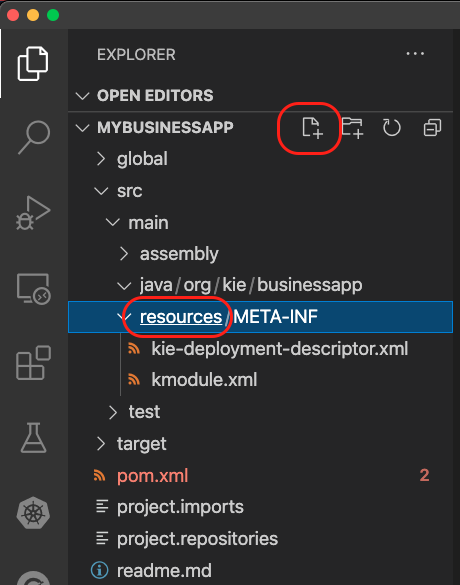
-
Name the file
automated-request-approval.dmnand press enter. The file should open in the DMN Editor. -
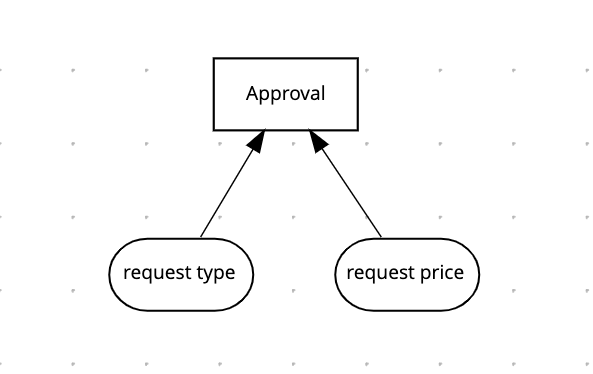
Create the following DMN:
-
This DRD contains:
- A decision node
Approvalof typeboolean; - Two inputs:
- A
request type, which isstring - A
request price, that is anumber.
- A
- A decision node
-
Implement the following decision table, in the decision node:
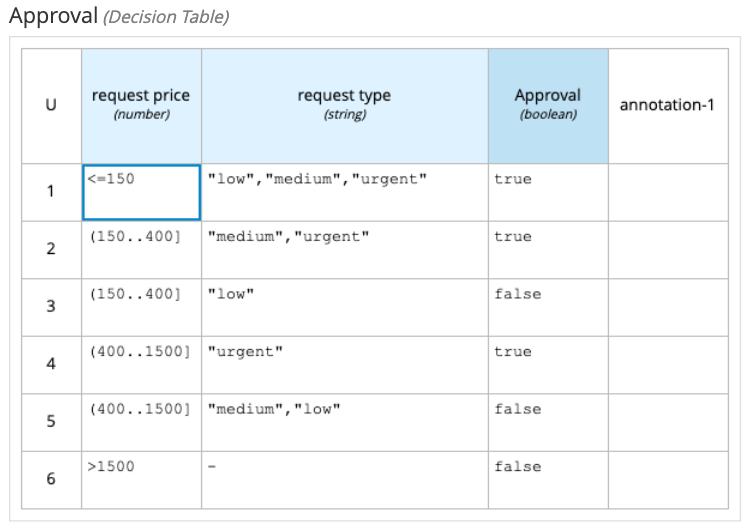
-
Save the diagram
53.2 Testing the decision
Before deploying the decision service in KIE Server, let's do some unit testing using the Test Scenario Simulation tooling.
53.2.1 Configuring the project
In order to use test scenarios, you need to add at least three dependencies to your project:
junit:junitorg.drools:drools-scenario-simulation-backendorg.drools:drools-scenario-simulation-api
Open the pom.xml file and add the following dependencies:
  <dependencies>
    <dependency>
      <groupId>org.drools</groupId>
      <artifactId>drools-scenario-simulation-api</artifactId>
      <version>${version.org.kie}</version>
      <scope>test</scope>
    </dependency>
    <dependency>
      <groupId>org.drools</groupId>
      <artifactId>drools-scenario-simulation-backend</artifactId>
      <version>${version.org.kie}</version>
      <scope>test</scope>
    </dependency>
    <dependency>
      <groupId>junit</groupId>
      <artifactId>junit</artifactId>
      <version>4.12</version>
      <scope>test</scope>
    </dependency>
  </dependencies>
53.2.2 Adding the JUnit Runner
In this scenario, the version.org.kie should be compatible with the product version you want to use. In this scenario, we are using IBAMOE 7.10, which would be <version.org.kie>7.67.2.Final-redhat-00017</version.org.kie>.
-
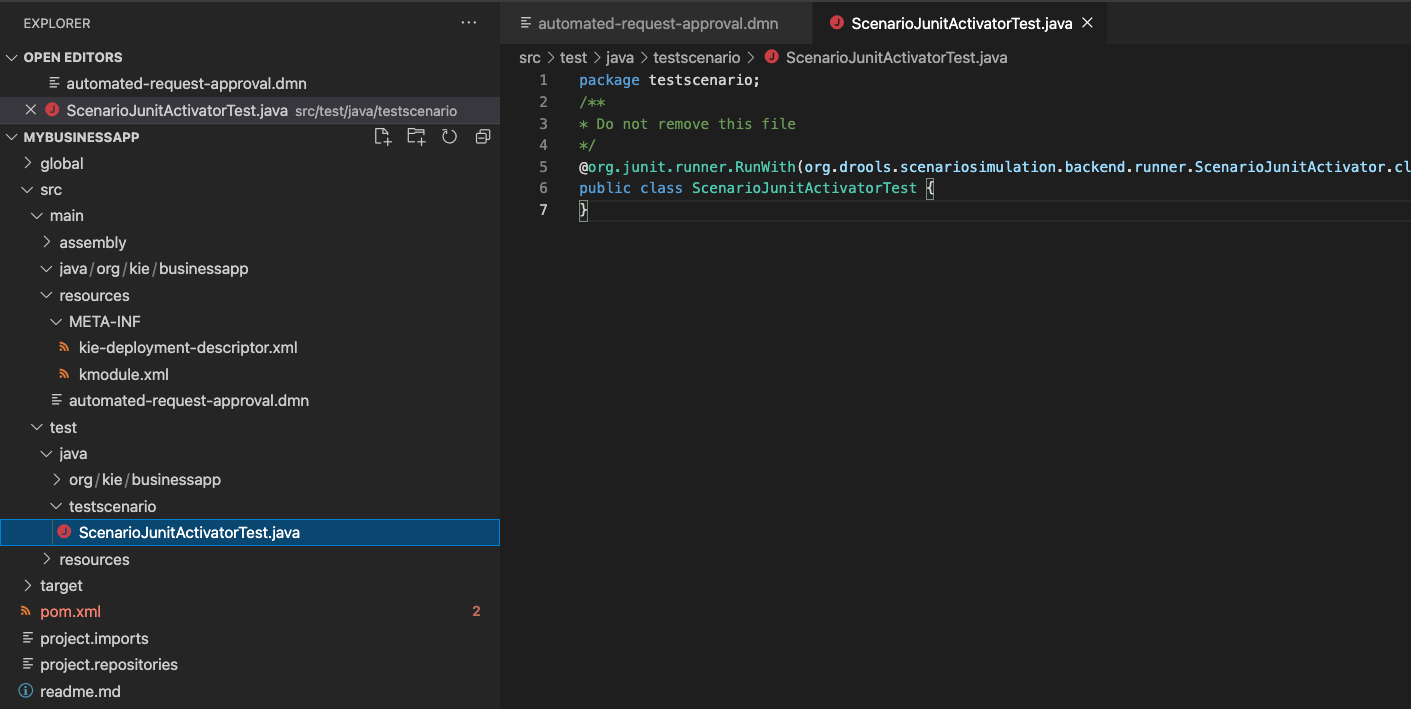
Create a new folder testscenario:
/src/test/java/testscenario -
In the folder you just created, add a file and name it
ScenarioJunitActivatorTest.java -
In this class, you should add a the Scenario Activator. This class allows the test scenarios to run along with the junit tests.
  package testscenario;
  /**
  * Do not remove this file
  */

  @org.junit.runner.RunWith(org.drools.scenariosimulation.backend.runner.ScenarioJunitActivator.class)
  public class ScenarioJunitActivatorTest {
  }
It should look like this:
53.2.3 Creating the test scenario
-
On the folder
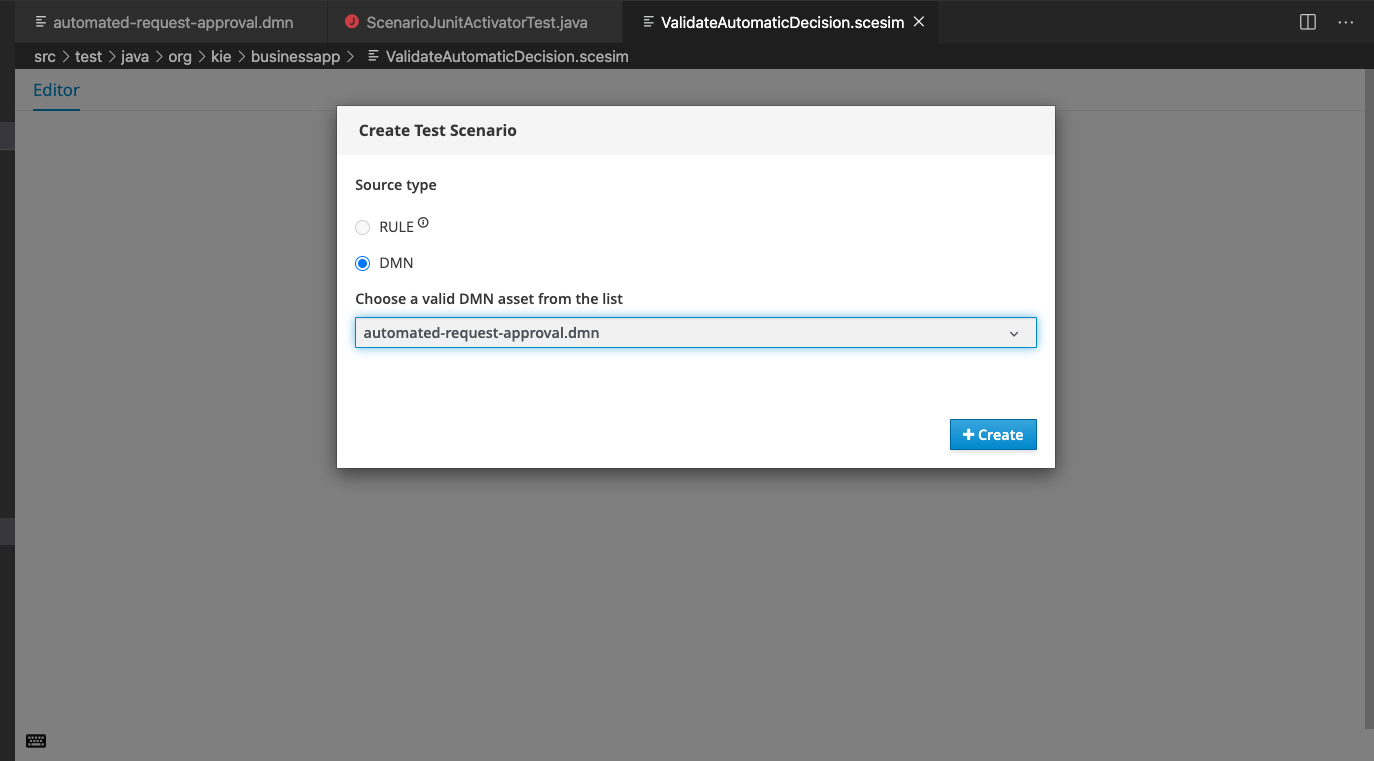
src/test/resources/org/kie/businessappcreate a new file namedValidateAutomaticDecision.scesim. -
The editor should open up with the option to choose the Source type. This is the type of rule you want to test.
-
Select DMN, next, choose your DMN file and click on the create button.
-
The tool will already bring the inputs and expected result columns based on your DMN. Now, implement the following test:

53.2.4 Runing the tests
You can run the tests in two ways: using maven or the JUnit activator class. To run the test with maven you can for example run:
If you want to run the tests using the activator class:
-
Right click the
ScenarioJunitActivatorTest.javafile and selectRun Java: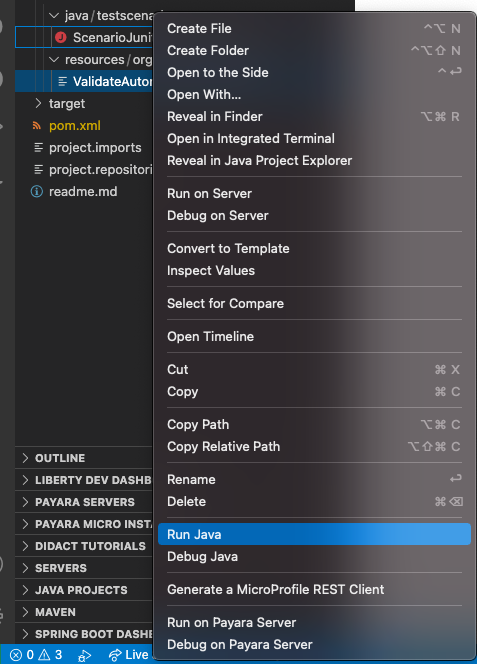
-
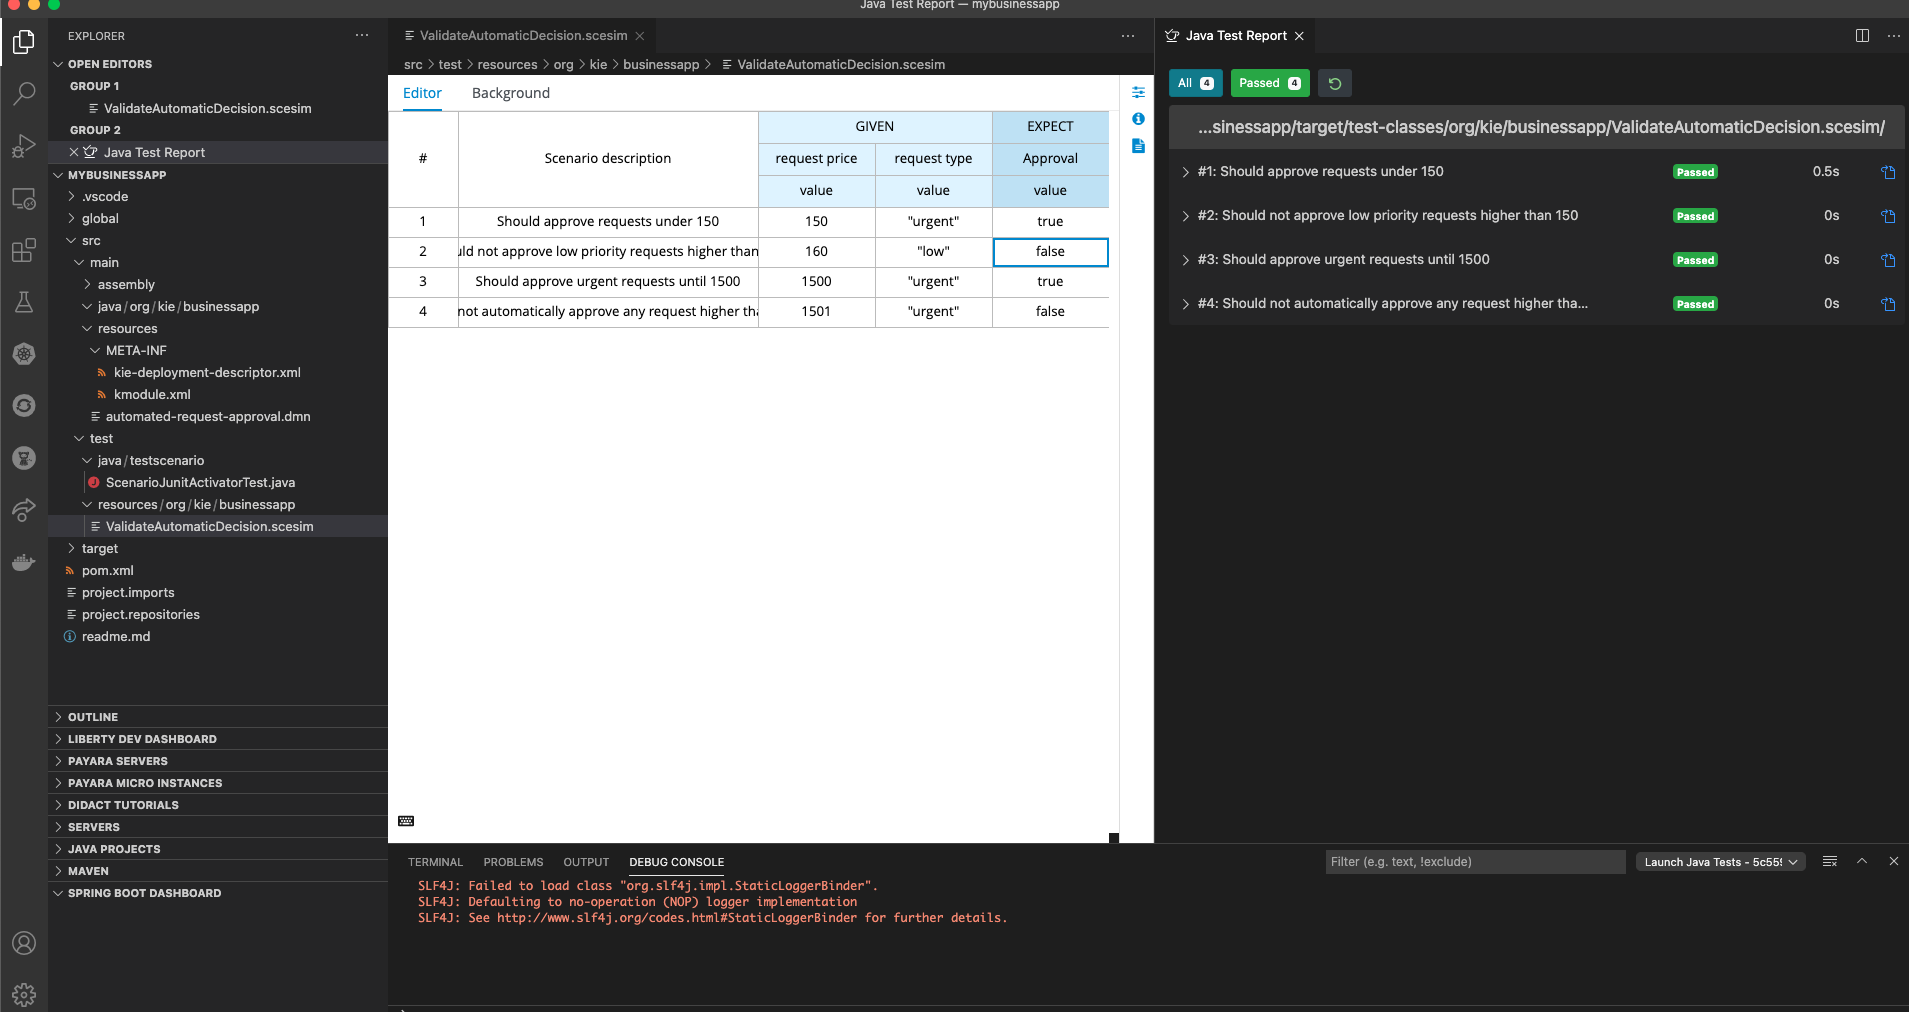
The execution results should show up:
-
Try changing the line one expected result from
truetofalse. Click on the re-run button to see the results.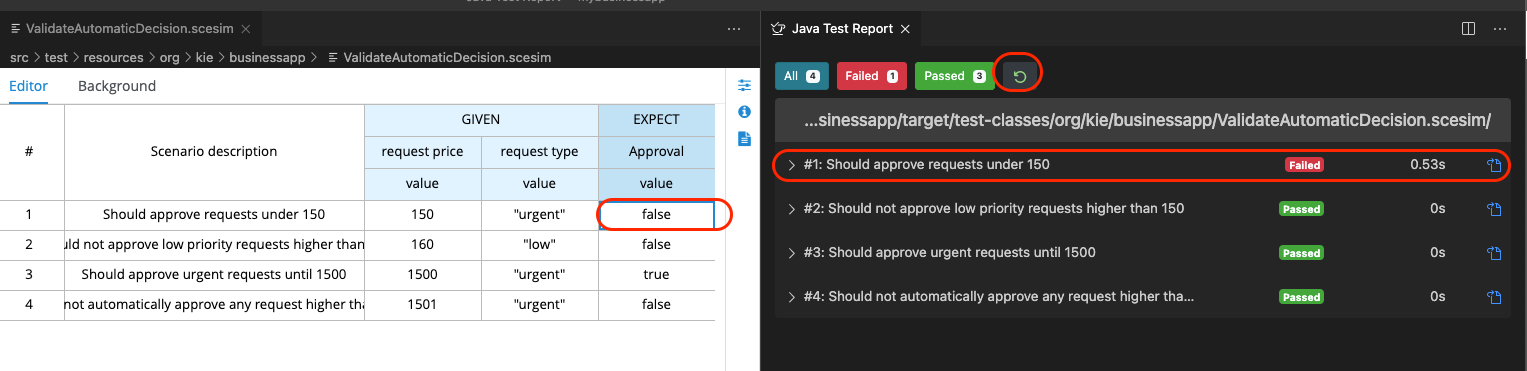
Finally, adjust the tests and make sure that your project can compile when you run:
53.3 Next Steps
Now it's time to deploy our project to KIE Server and test it out.