41. Emmitting Events from Business Processes
In order to be able to finish processes based on new events, we will need to set up our environment.
In this setup we will:
- Check the required configuration in the business project
- Add bpmn components to emit messages
41.1 Emitting events in a business process
-
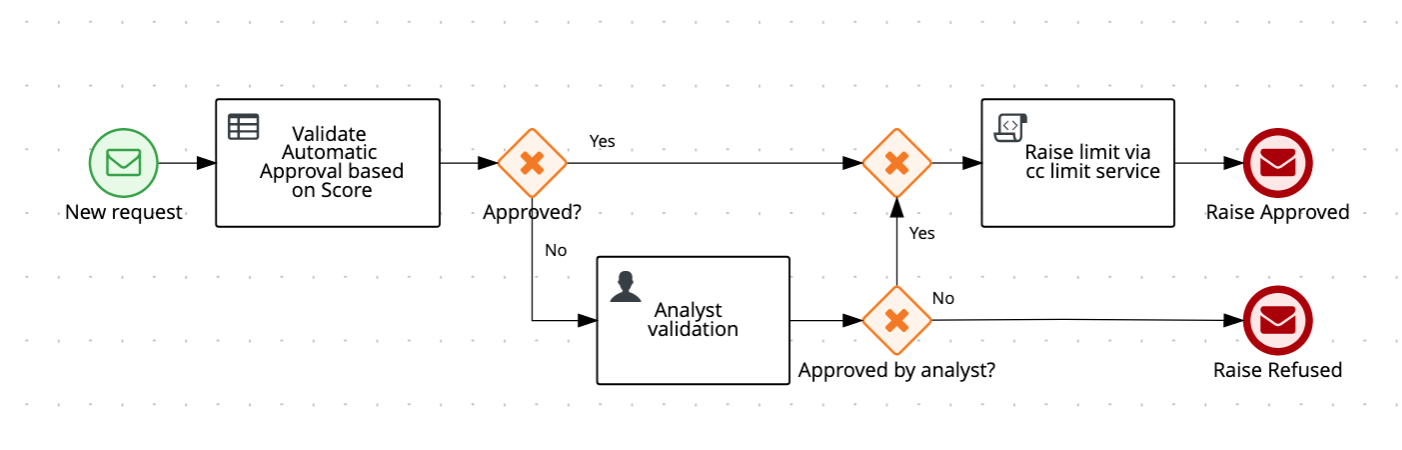
Now, we need to End Message Events instead of two End Events. In Business Central, open the
cc-limit-approval-appprocess. -
Convert the two End Events to End Message Events. It should look like this:
-
Next, configure the Kafka topic name in the message name for both nodes as following:
Raise Approvedmessage name:requests-approved-
Raise Deniedmessage name:requests-deniedSee below one of the nodes, the Raise Denied node configuration:
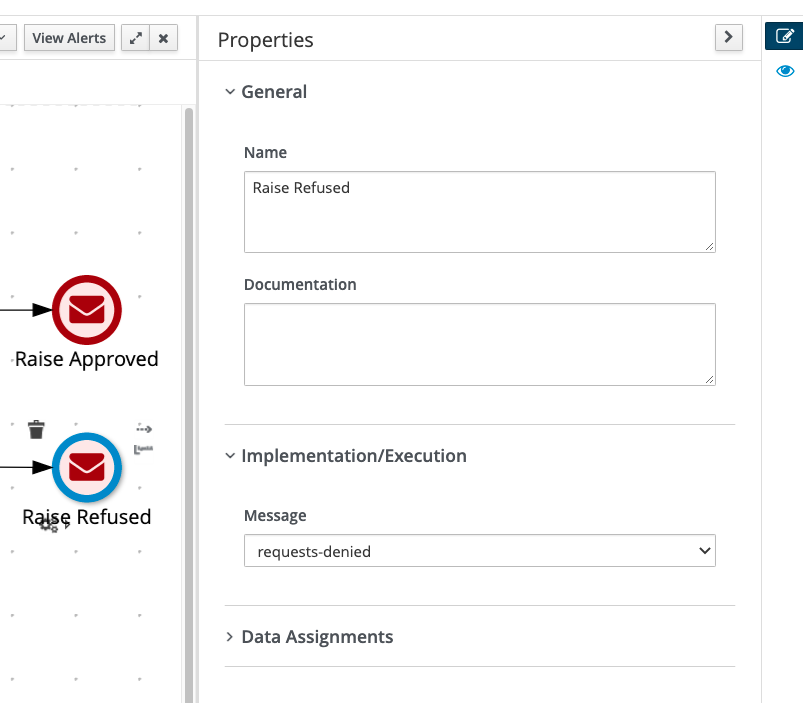
-
Save the process definition.
-
On the breadcrumb, click on "cc-limit-approval-app-step1" to go back to the Project Explorer view.
-
Click on the "Deploy" button.
41.2 Configuring the business application
-
In Business Central, navigate to the Project Settings -> Deployments -> Work Item handlers:
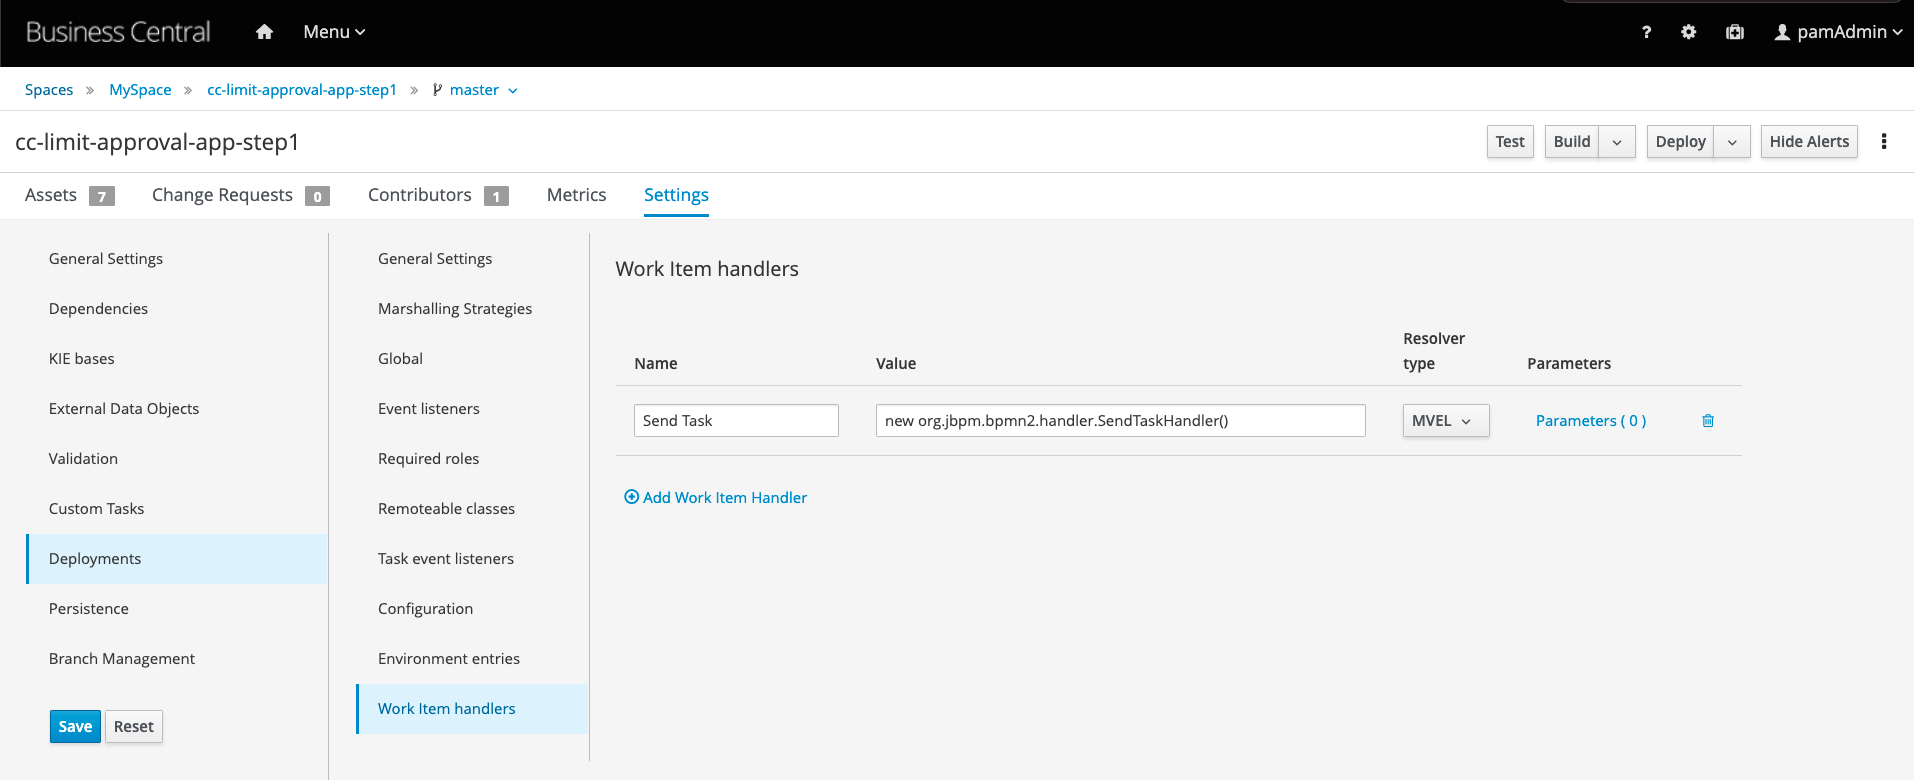
Observe that there is a task configured named Send Task. In IBAMOE {{ version }} you need this configuration to be able to use any Message Events (ending and throwing) that would emit events.
41.3 Consuming the events from Kafka topic using Kafka Consumer CLI
In order to validate if our process is emitting processes as we expect, we need to listen to the Kafka topics requests-approved and requests-denied to validate if the messages were emitted correctly.
-
Open a new terminal tab, and navigate to the Kafka project folder.
-
Start the Kafka command line tool that allows us to consume events that happen in a topic, and therefore, will allow us to know if IBAMOE published the events when the process ended. The tool is
kafka-console-consumer.sh. Let's check if the process emitted events on the topicrequests-approved.
41.4 Testing the solution
To test the solution, we will start a new process instance that will start, be automatically approved, and end without any human interaction. A new process instance should get started whenever you publish a new event on the incoming-requests topic, and, when there is an automatic approval, the process will end and publish an event to the requests-approved topic. Let's see this in action:
-
Like we did on the first lab, let's start a new process instance by publishing a message in the
incoming-requeststopic. If you canceled the execution of the kafka producer, here's how you can start it:docker-compose exec kafka bin/kafka-console-producer.sh --topic incoming-requests --bootstrap-server localhost:9092You can use the following data in your event:
{"data" : {"customerId": 1, "customerScore": 250, "requestedValue":1500}} -
When you hit return, the data is published to the
incoming-requeststopic -
Kafka reads the event from the
incoming-requestsand automatically instantiates a new process is with this data. -
Now check the terminal where you are consuming the messages in the
requests-approvedtopic. You should see a new event published by your process. The event will look like this (though not on multiple lines): -
Identify the process ID on the event above. In this example, the process instance that emitted this event was process of ID 5.
-
Let's check this same process instance in Business Central. In Business Central, open the Menu -> Manage -> Process Instances.
-
On the left column, filter by "Completed" State. You should see as many instances as the number of events you published on Kafka.
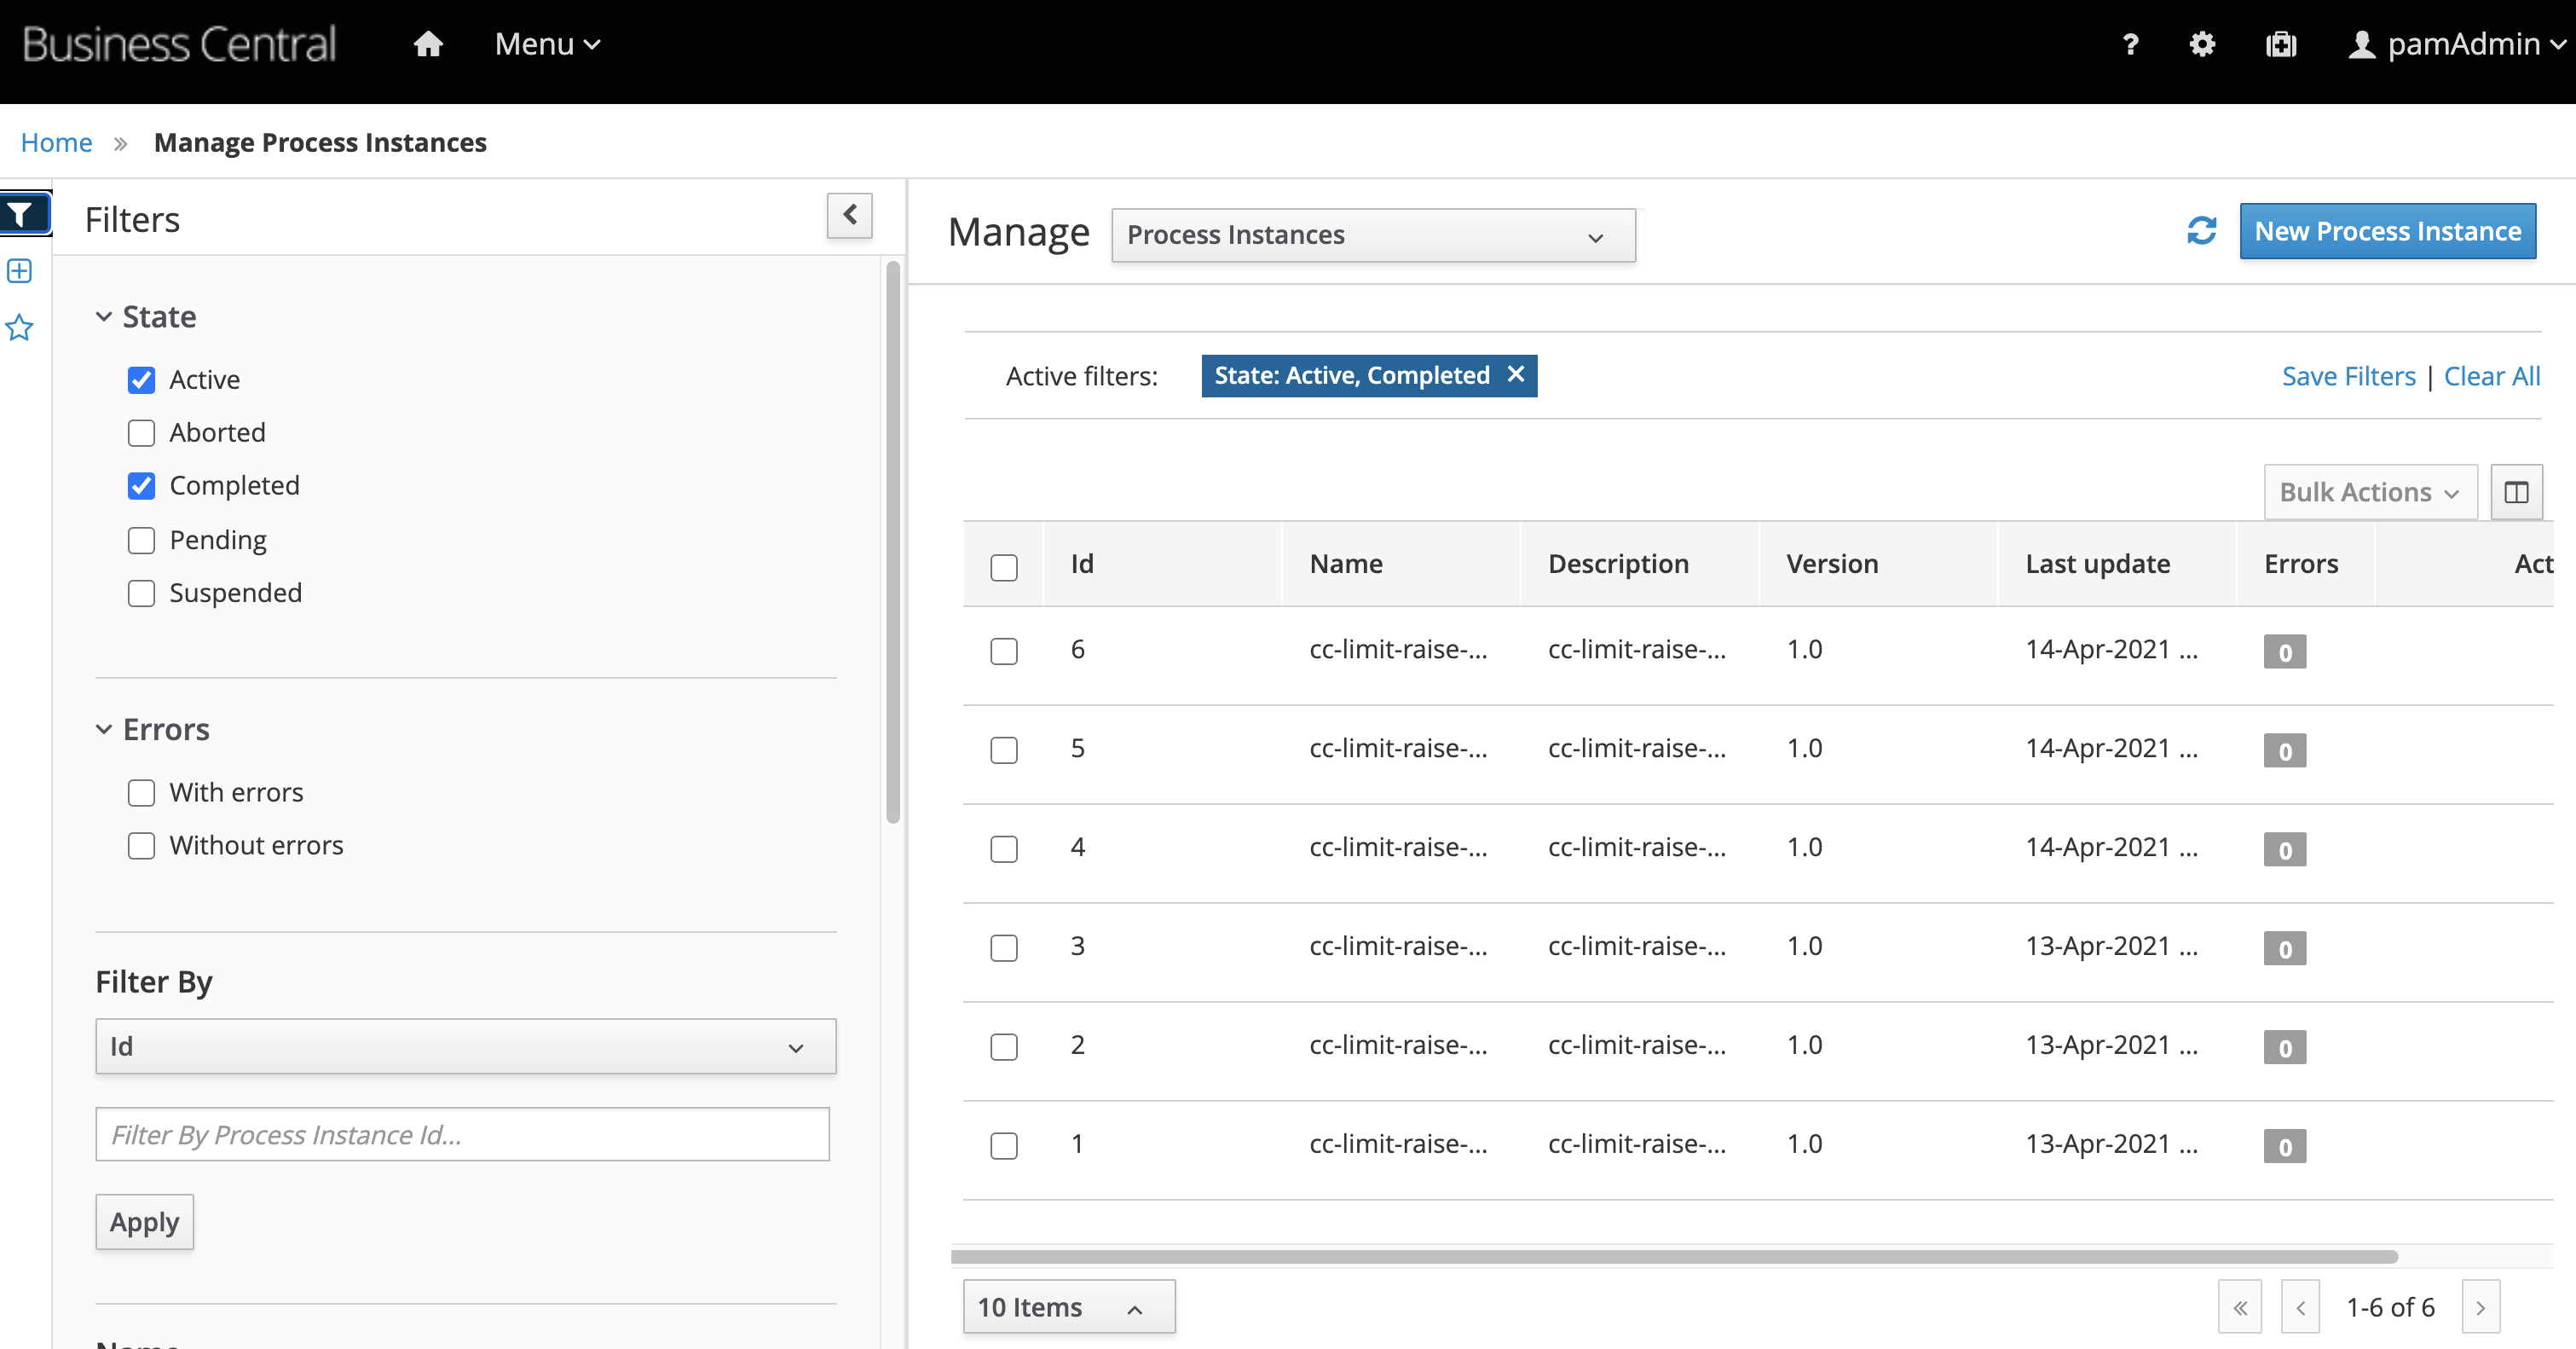
-
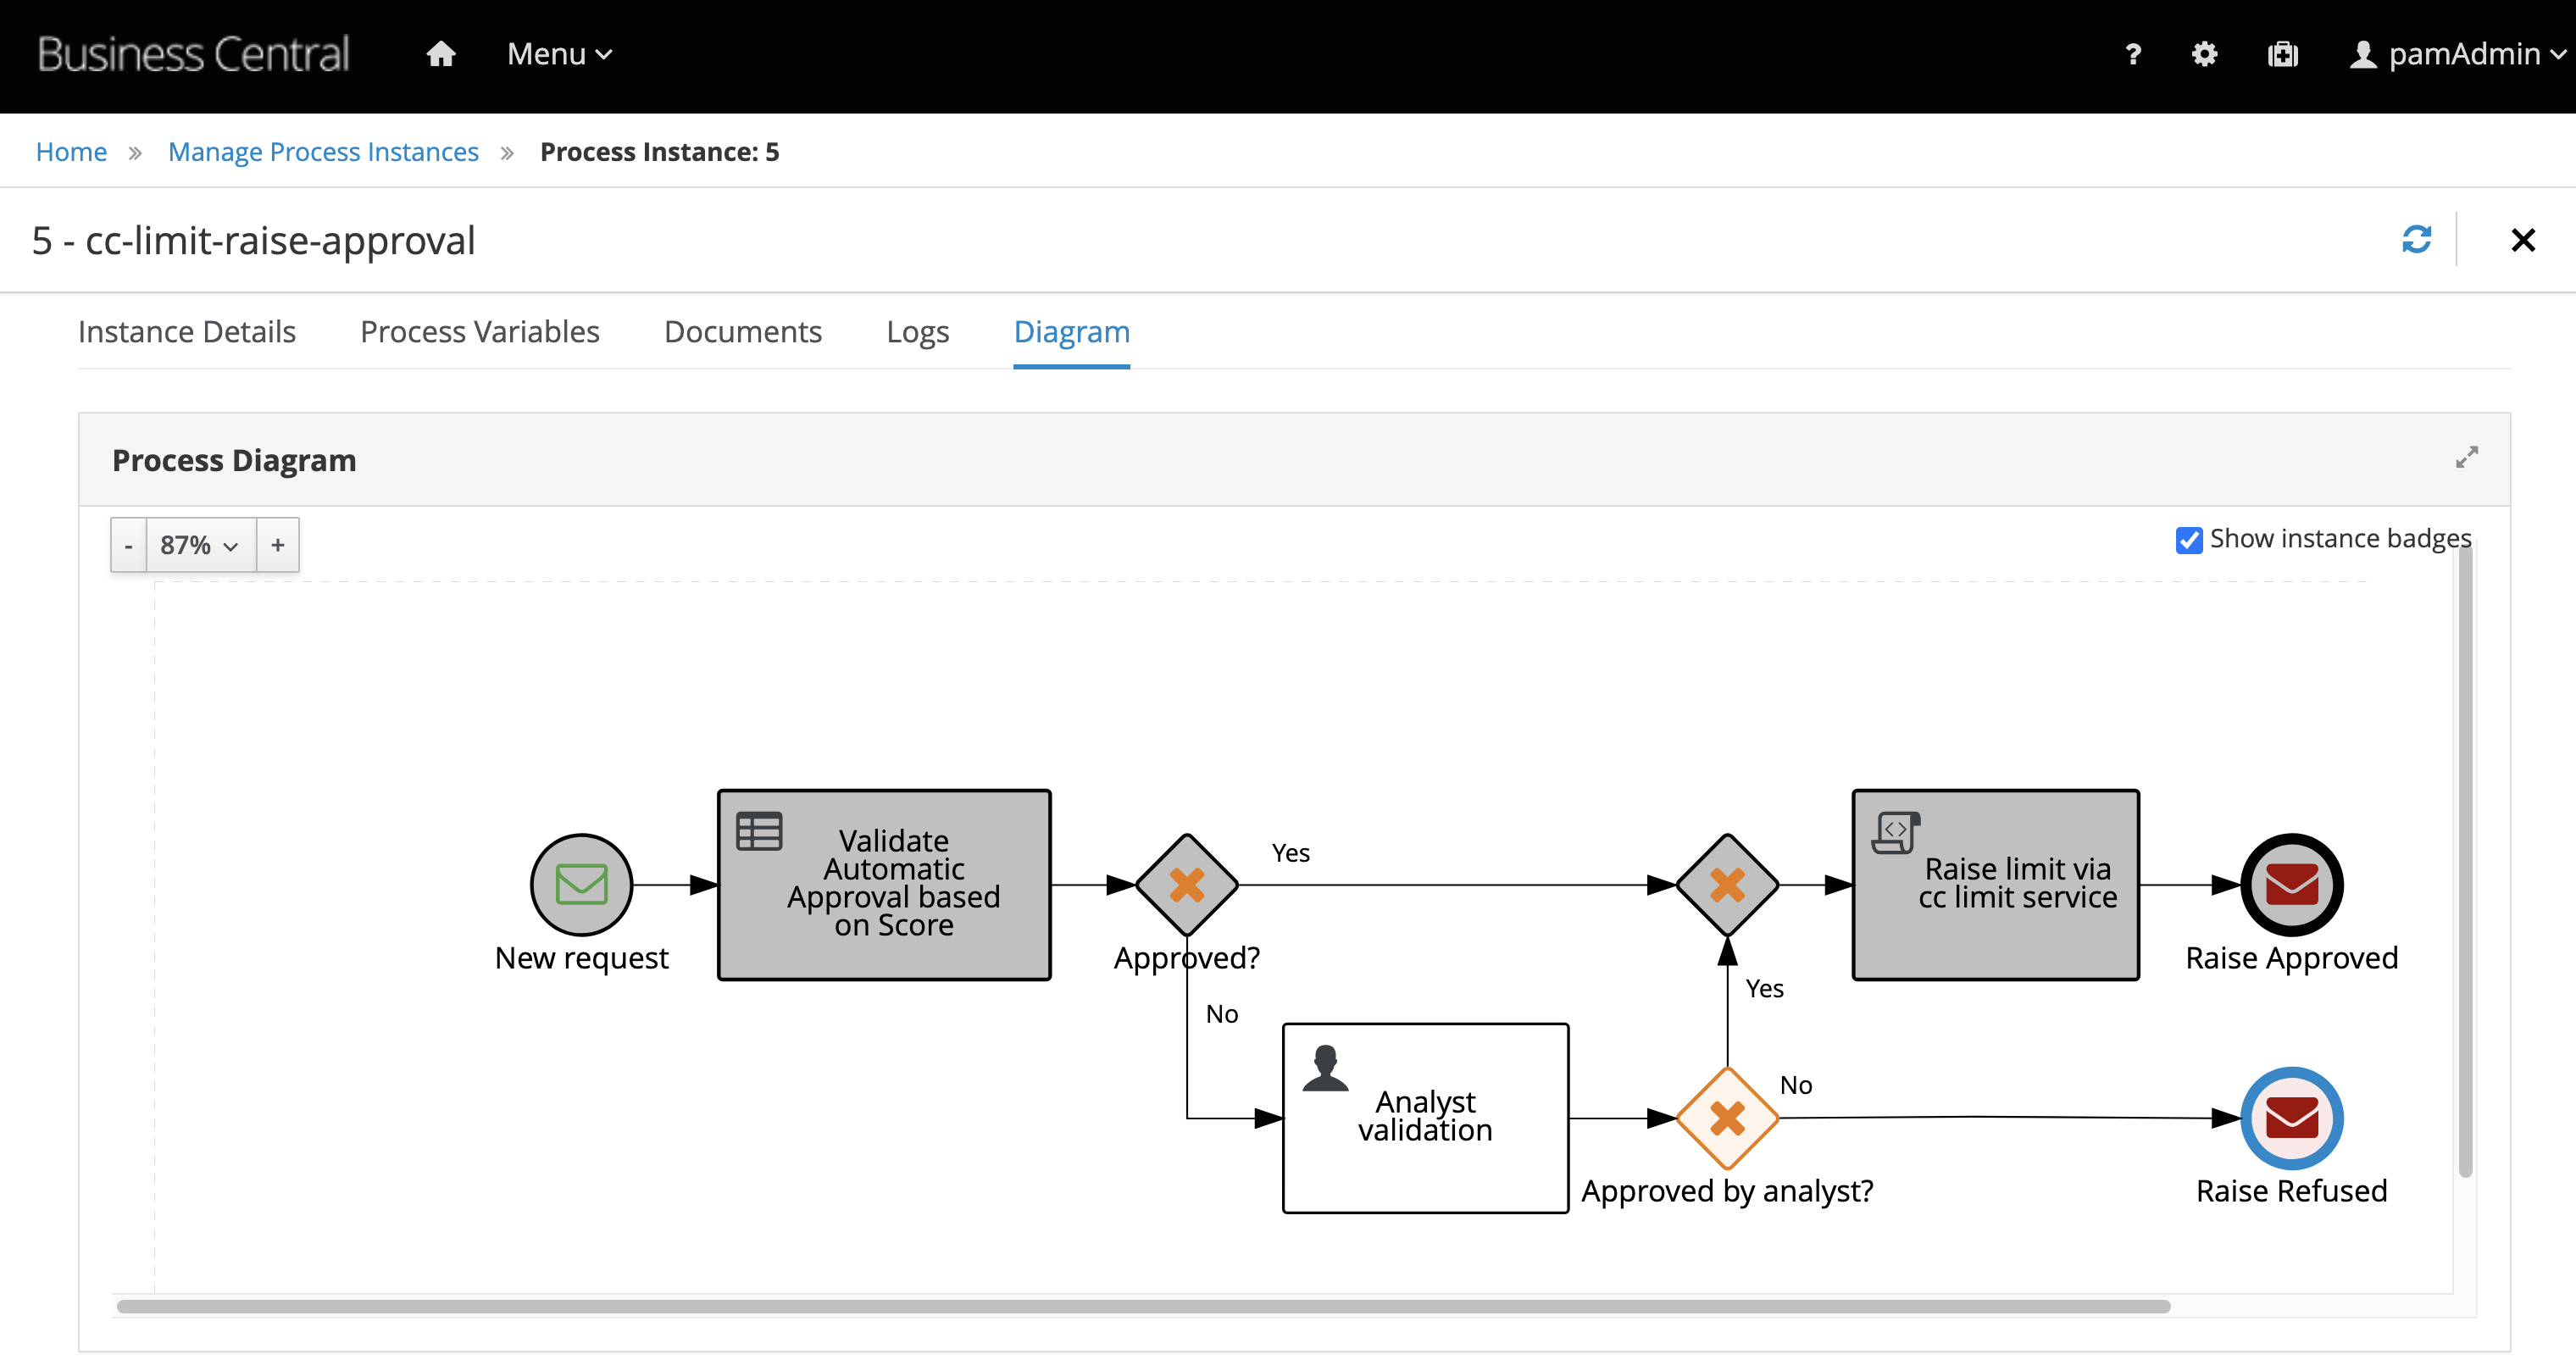
Identify your process instance ID. In this example, instance with id 5. Select the process instance.
-
Next, select the tab
Diagram. You should see something like: