4. Using Maven to create the project workspace
In the previous section, you setup Maven locally in your environment, so you should now have access to all of the mvn commands that are associated with running it. The first thing we're going to create is a project using the proceeding steps:
-
We're going to create the service in Quarkus with the Maven commands below, this will create a Quarkus project called
quick-kogitothat will be versioned1.0.0-SNAPSHOTincluding the extensionskogito-quarkus, dmn, resteasy-reactive-jackson, quarkus-smallrye-openapi, quarkus-smallrye-healthwhich will create a Quarkus DMN project with the openapi components to get the OpenAPI end points easily with health checks when deploying to OpenShift.mvn io.quarkus:quarkus-maven-plugin:2.16.7.Final:create \ -DprojectGroupId=com.ibm.sample \ -DprojectArtifactId=quick-kogito \ -DprojectVersion=1.0.0-SNAPSHOT \ -DplatformVersion=2.16.7.Final \ -Dextensions=kogito-quarkus,dmn,resteasy-reactive-jackson,quarkus-smallrye-openapi,quarkus-smallrye-health -
When you create this project you should get a bunch of Maven artifacts start to stream in your console that are being pulled and ultimately are left with a console message like the below:
[INFO]
[INFO] ========================================================================================
[INFO] Your new application has been created in /Users/timwuthenow/techxchange/quick-kogito
[INFO] Navigate into this directory and launch your application with mvn quarkus:dev
[INFO] Your application will be accessible on http://localhost:8080
[INFO] ========================================================================================
[INFO]
[INFO] ------------------------------------------------------------------------
[INFO] BUILD SUCCESS
[INFO] ------------------------------------------------------------------------
[INFO] Total time:  8.555 s
[INFO] Finished at: 2023-07-17T13:35:03-04:00
[INFO] ------------------------------------------------------------------------
NOTE: If you are using an image provided by IBM for labs, the 8080 port location that is labeled here will not work immediately because another service is utilizing this port. We will show how to change this in the next steps.
-
With VSCode installed to your PATH variables, you can open the workspace by doing the below command, otherwise open VSCode and navigate to where you ran the command for quick-kogito to be created at:
-
From here we can see the workspace's contents and if we expand the contents of
/src/mainyou will see the creation of several artifacts. Withinjavayou will have aGreetingResource.javaand withinresourcesyou will have anapplication.propertiesandpricing.dmnfile. These are sample files that can be later modified or deleted, but we will be explore them first in this section, but will do more in later labs around the various end points.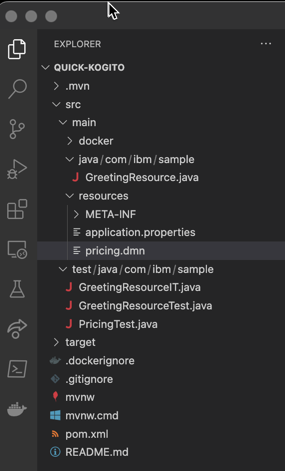
-
Let's first click the
pricing.dmnfile to open it. When you do so you may be greeted with a message similar toThis diagram does not have layout information. Click 'Yes' to compute optimal layout, it takes time according to the diagram size. Click 'No' to proceed without layout. Please save the layout changes once diagram is opened.- if so clickYesto automap the DMN locations.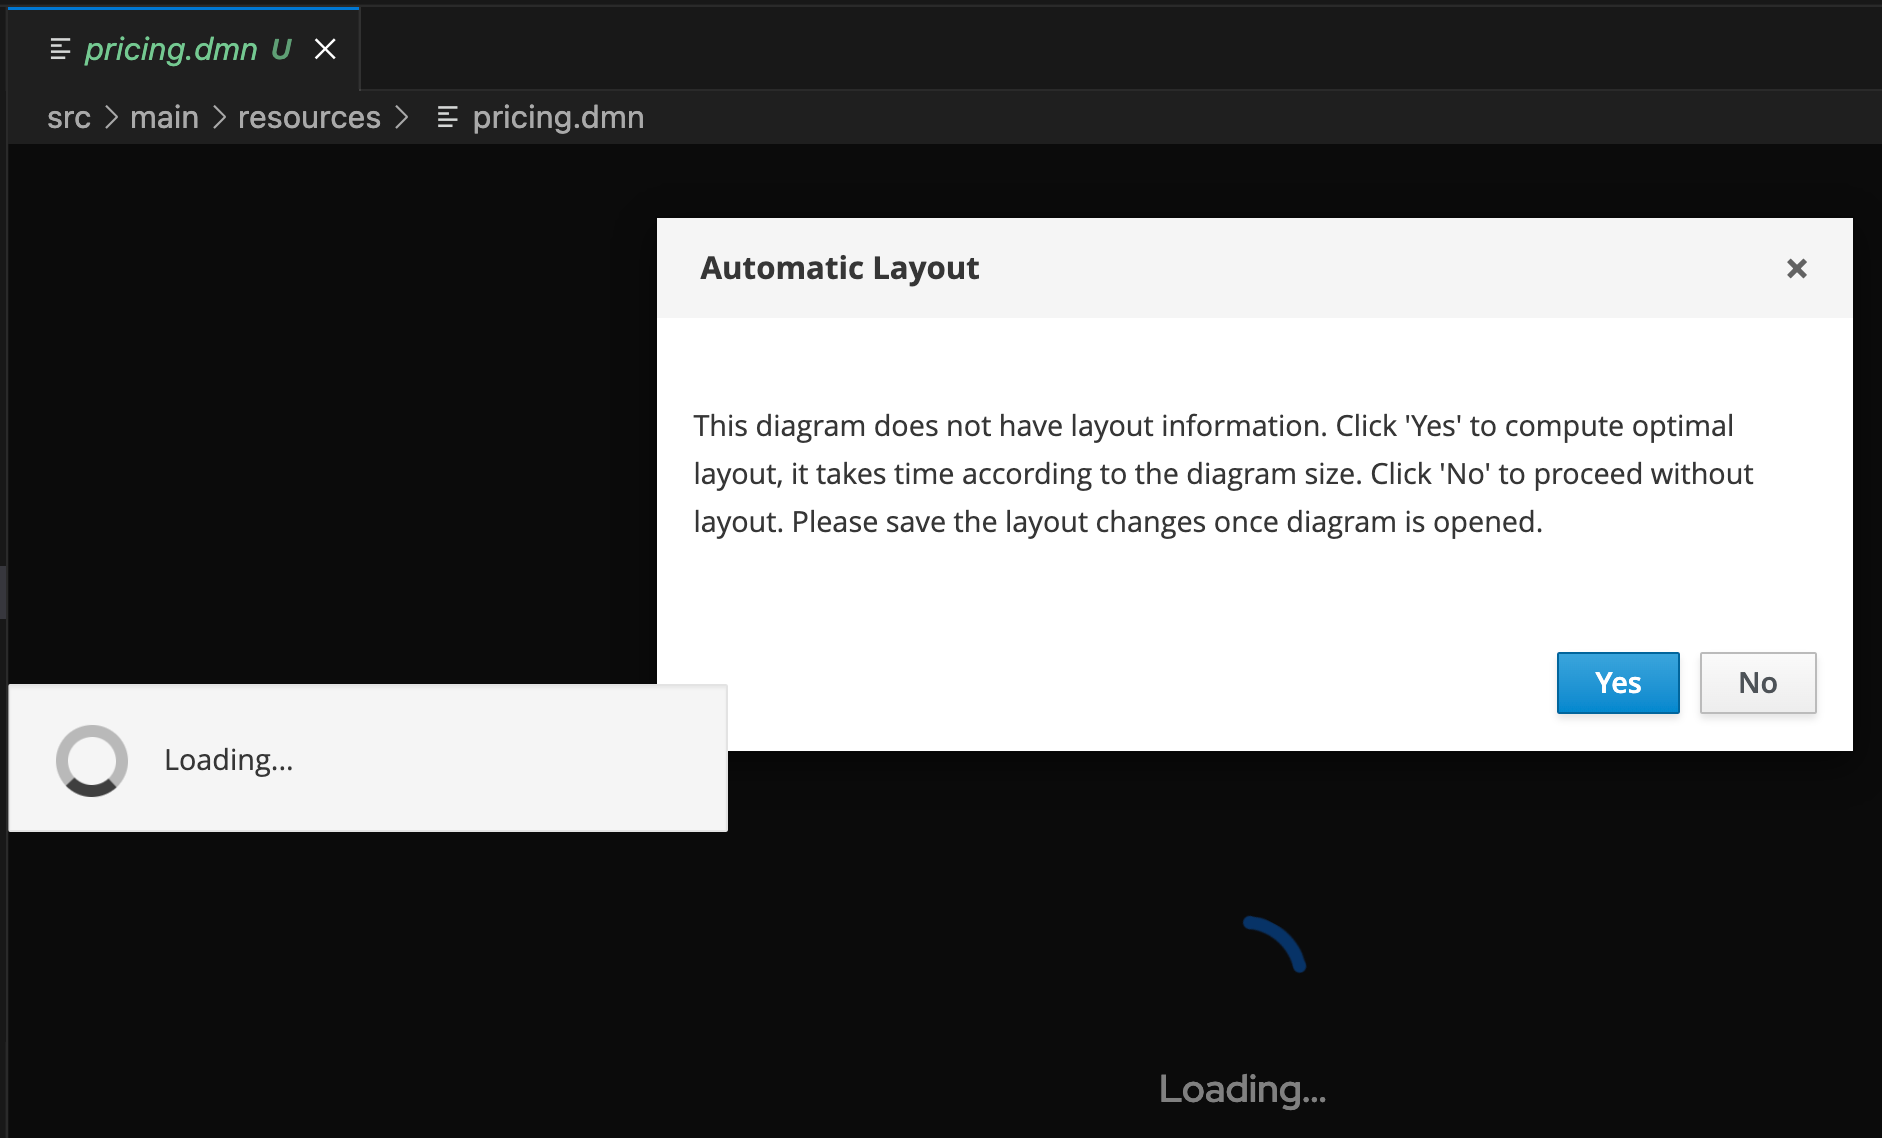
-
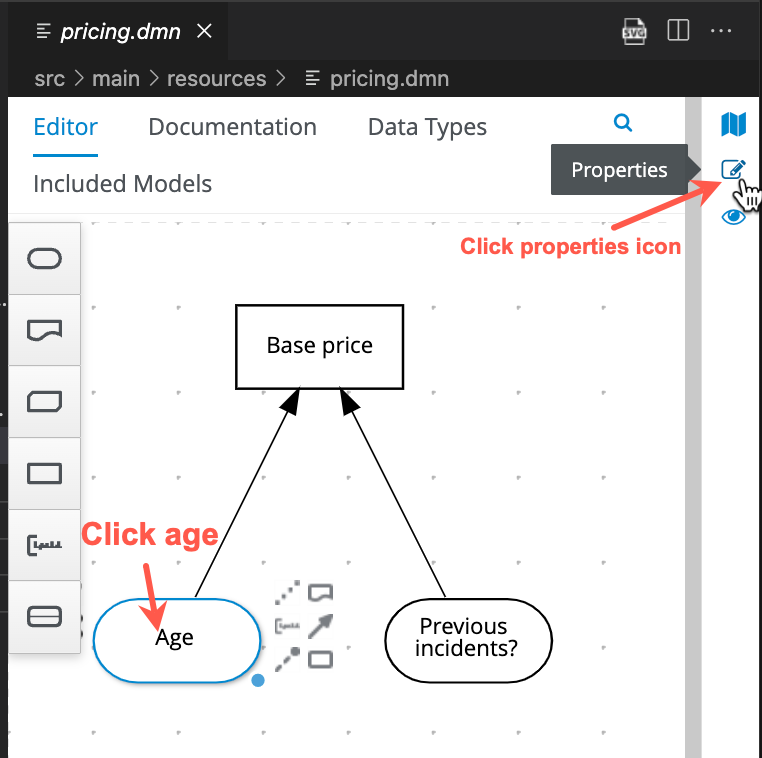
When the diagram opens you will see something similar to below, so we will start exploring it. The DMN is made up of two inputs Age and Previous incidents?, which are used to make the decision, Base price.
-
If you click Age and then click the Properties icon on the right, you will open a pane for the input.
-
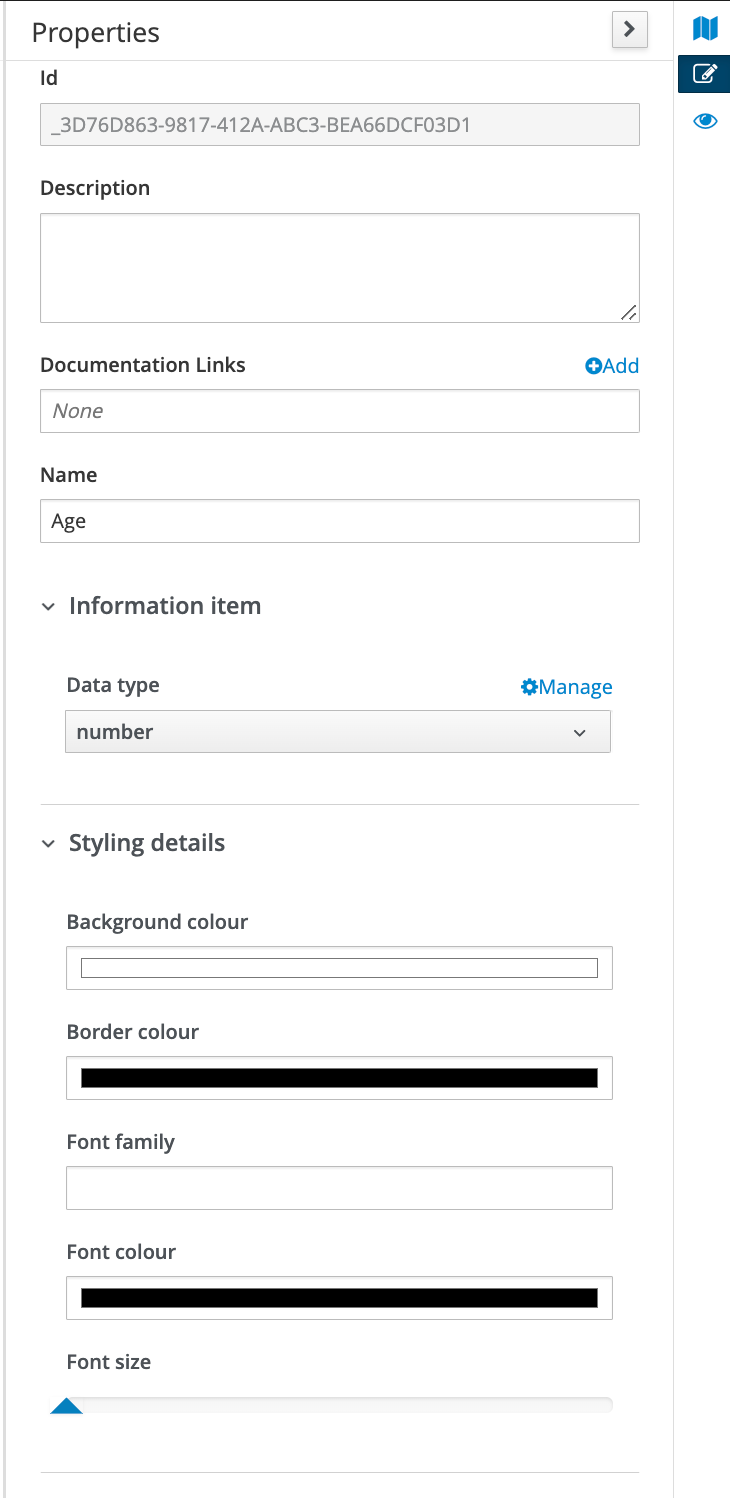
Within this pane, you can see information about the input Age, this includes that it is a number and what the input name is. More can be changed around this object, including changing the color of the node, font size, etc.
-
To view the Decision, click the square decision node and select the
Editbutton to enter the decision for Base Price.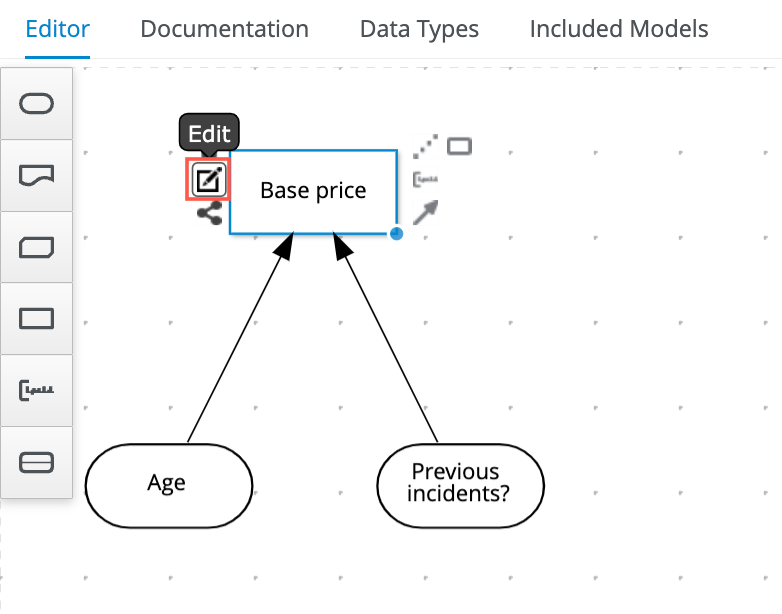
-
From here you will see the Decision Table that is associated with the Base Price decision. From here you will see two (2) input columns (
AgeandPrevious Incidents), as well as one output column (Base price) all with their types below them. These types are controlled from the properties panel similarly to how they were opened when looking atAgea few steps ago. This decision has 4 different rows that could fire, with a Hit Policy ofUNIQUEsignified by the U in the top left corner of the table. A decision writer could make any comments they want to the table and have them saved towards the decision here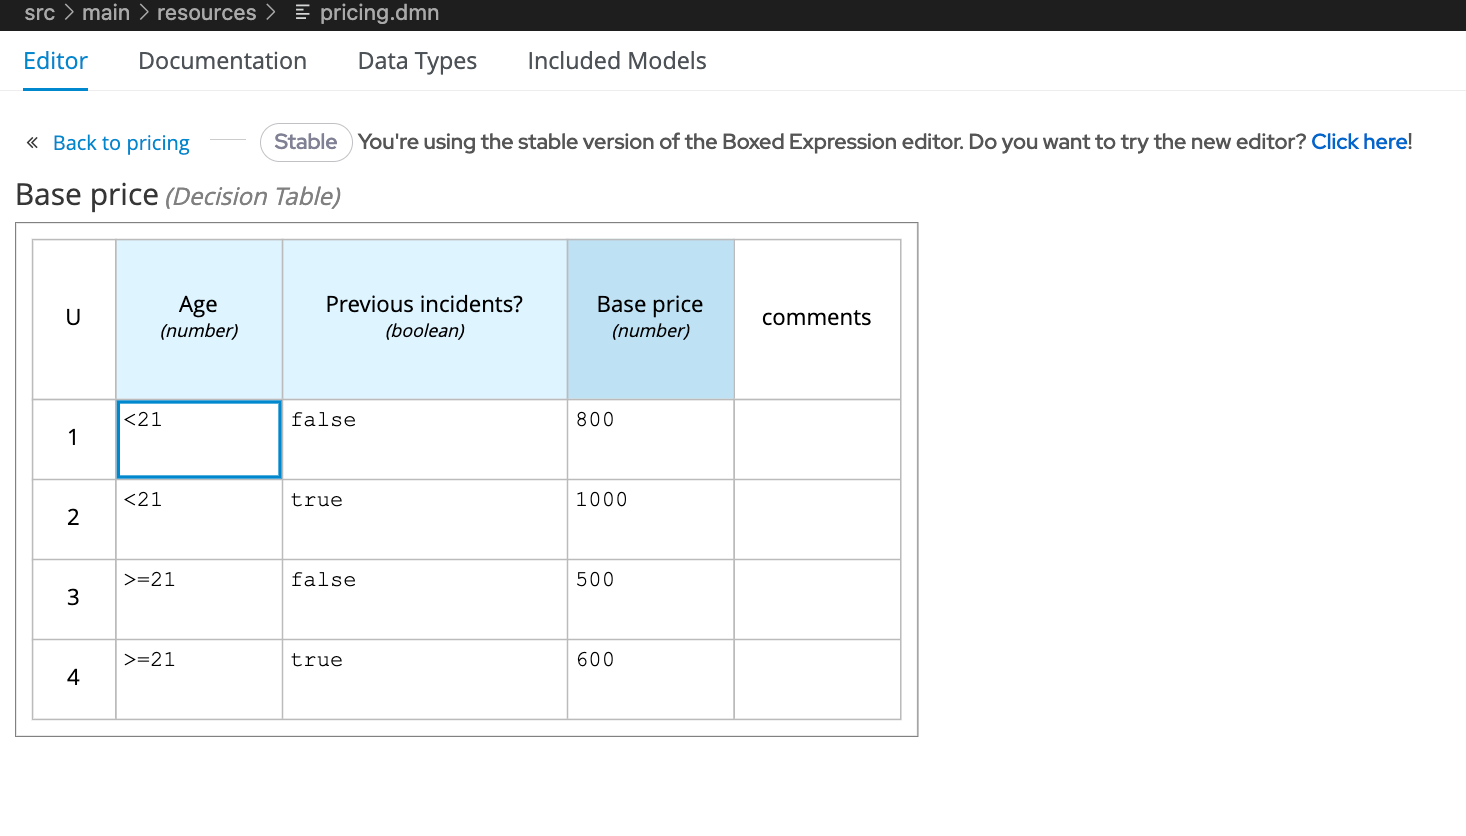
4.1 Create a GitHub repository for the project
One last thing we're going to do is to create a GitHub repository for this service, so you have somewhere to store our changes and also take advantage of building it into a cloud service running on OpenShift.
-
You can create a repository on GitHub. To do this login to your GitHub username (or create one if you don't have one!) and from your home page and click the green
Newicon near the top left of the page (or you can navigate directly to here)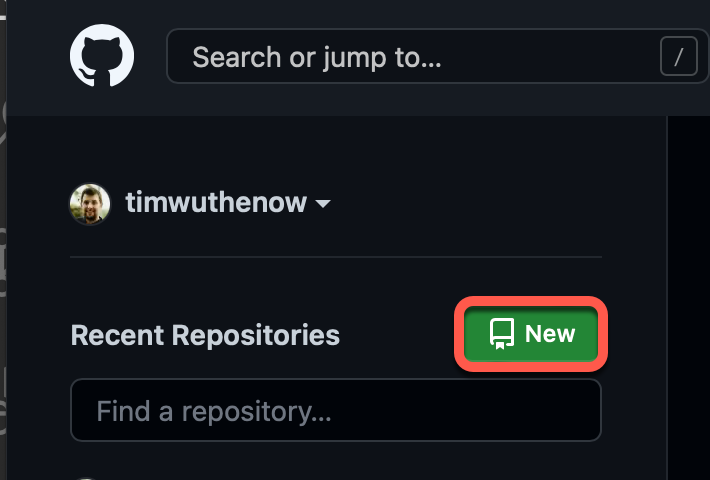
-
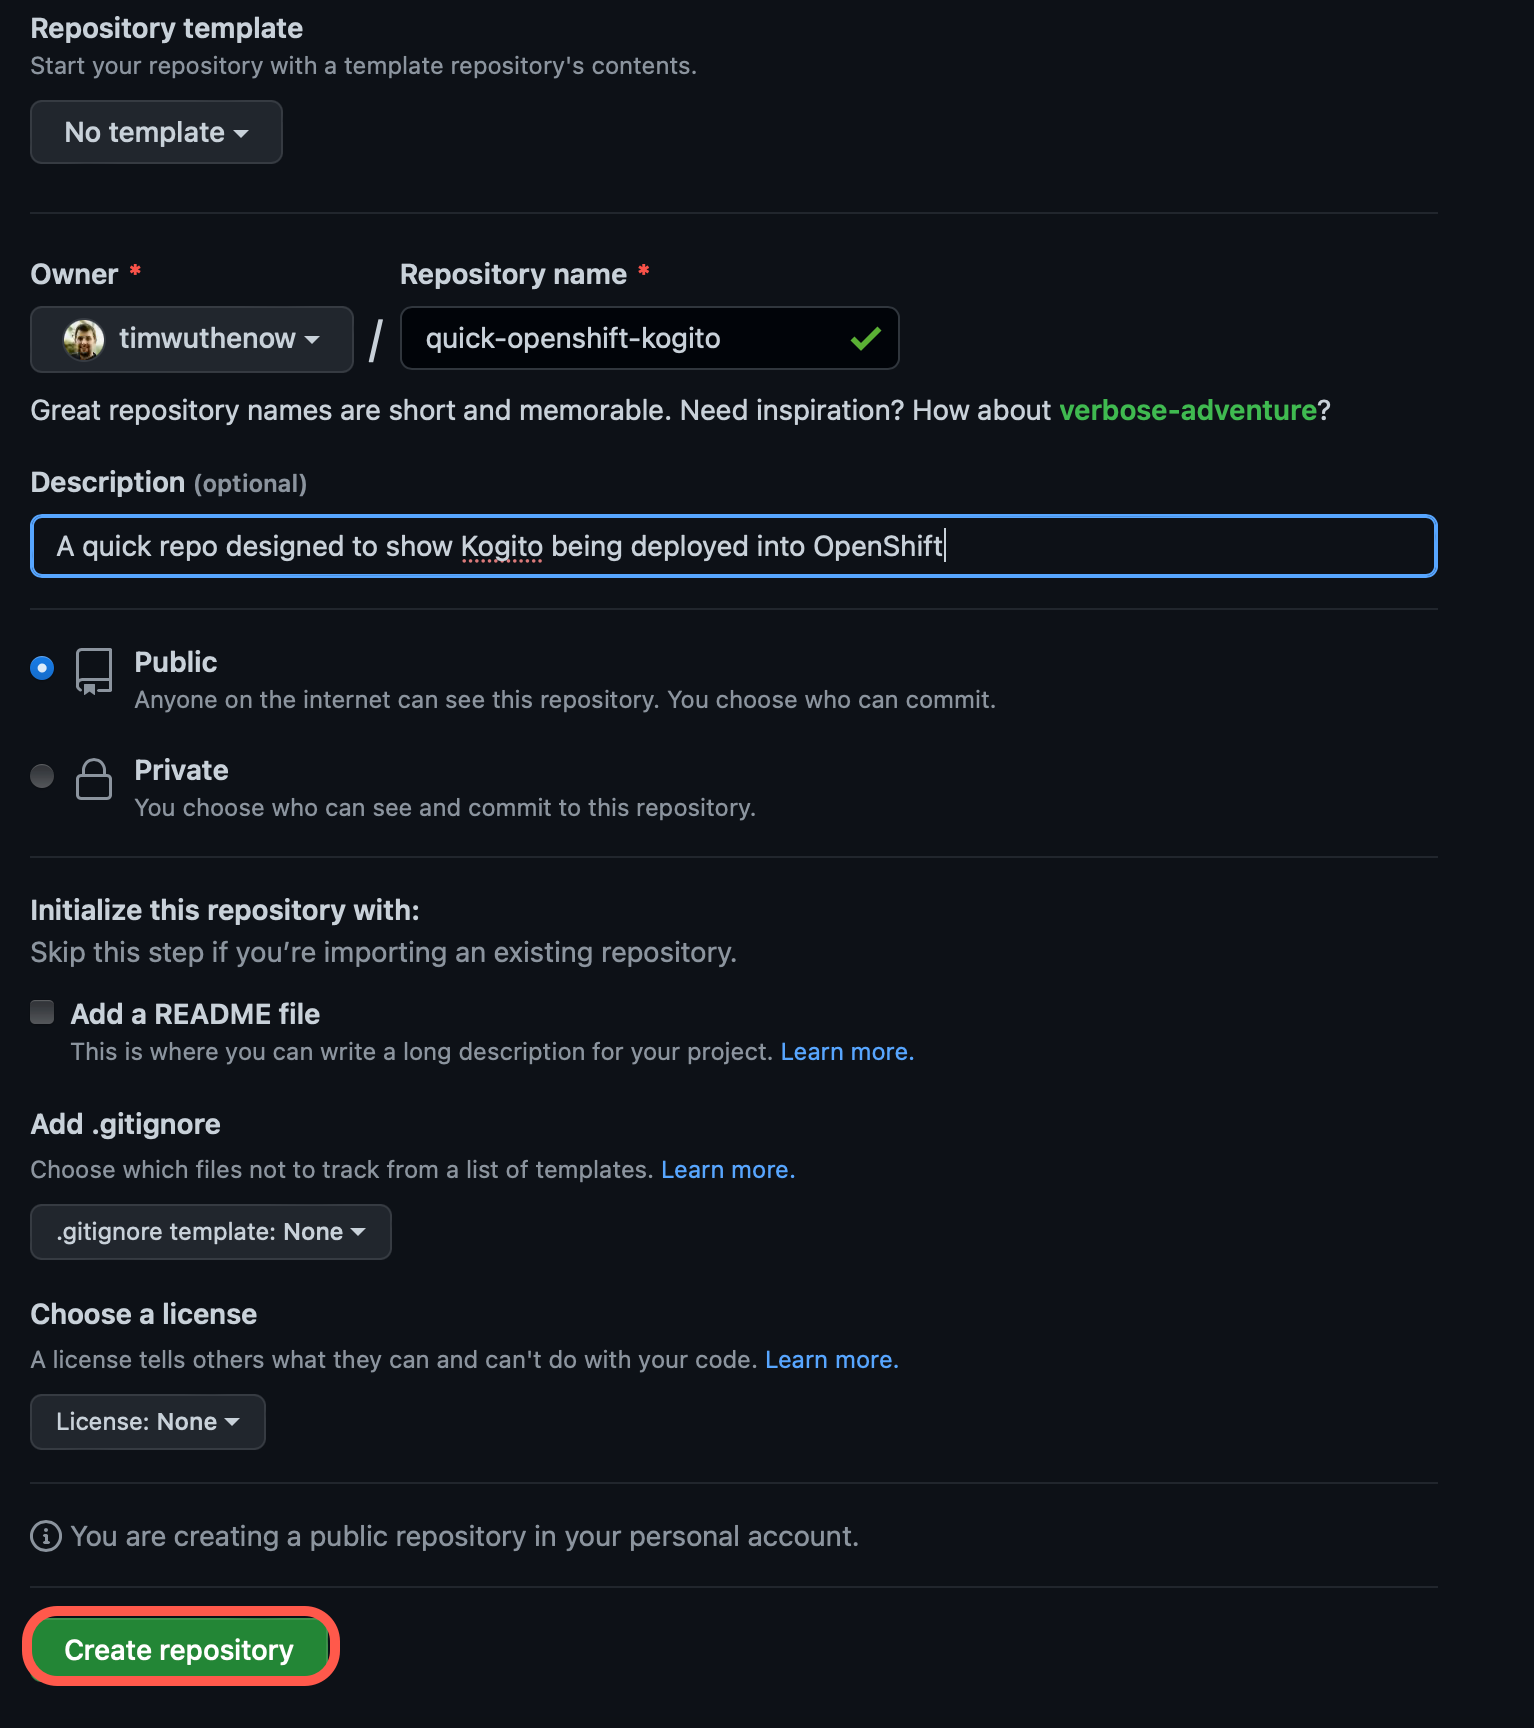
Fill out the form with your values
- Repository Name: quick-openshift-kogito
- Select Public for now
- Add a Description if you want
- Click Create Repository
-
Copy the command for ...or create a new repository on the command line as we're going to take exactly what's in our repository add a mostly empty
README.mdand push those changes to GitHub. The below command is an example and will not be the exact same as what you have on your repository. Copy yours.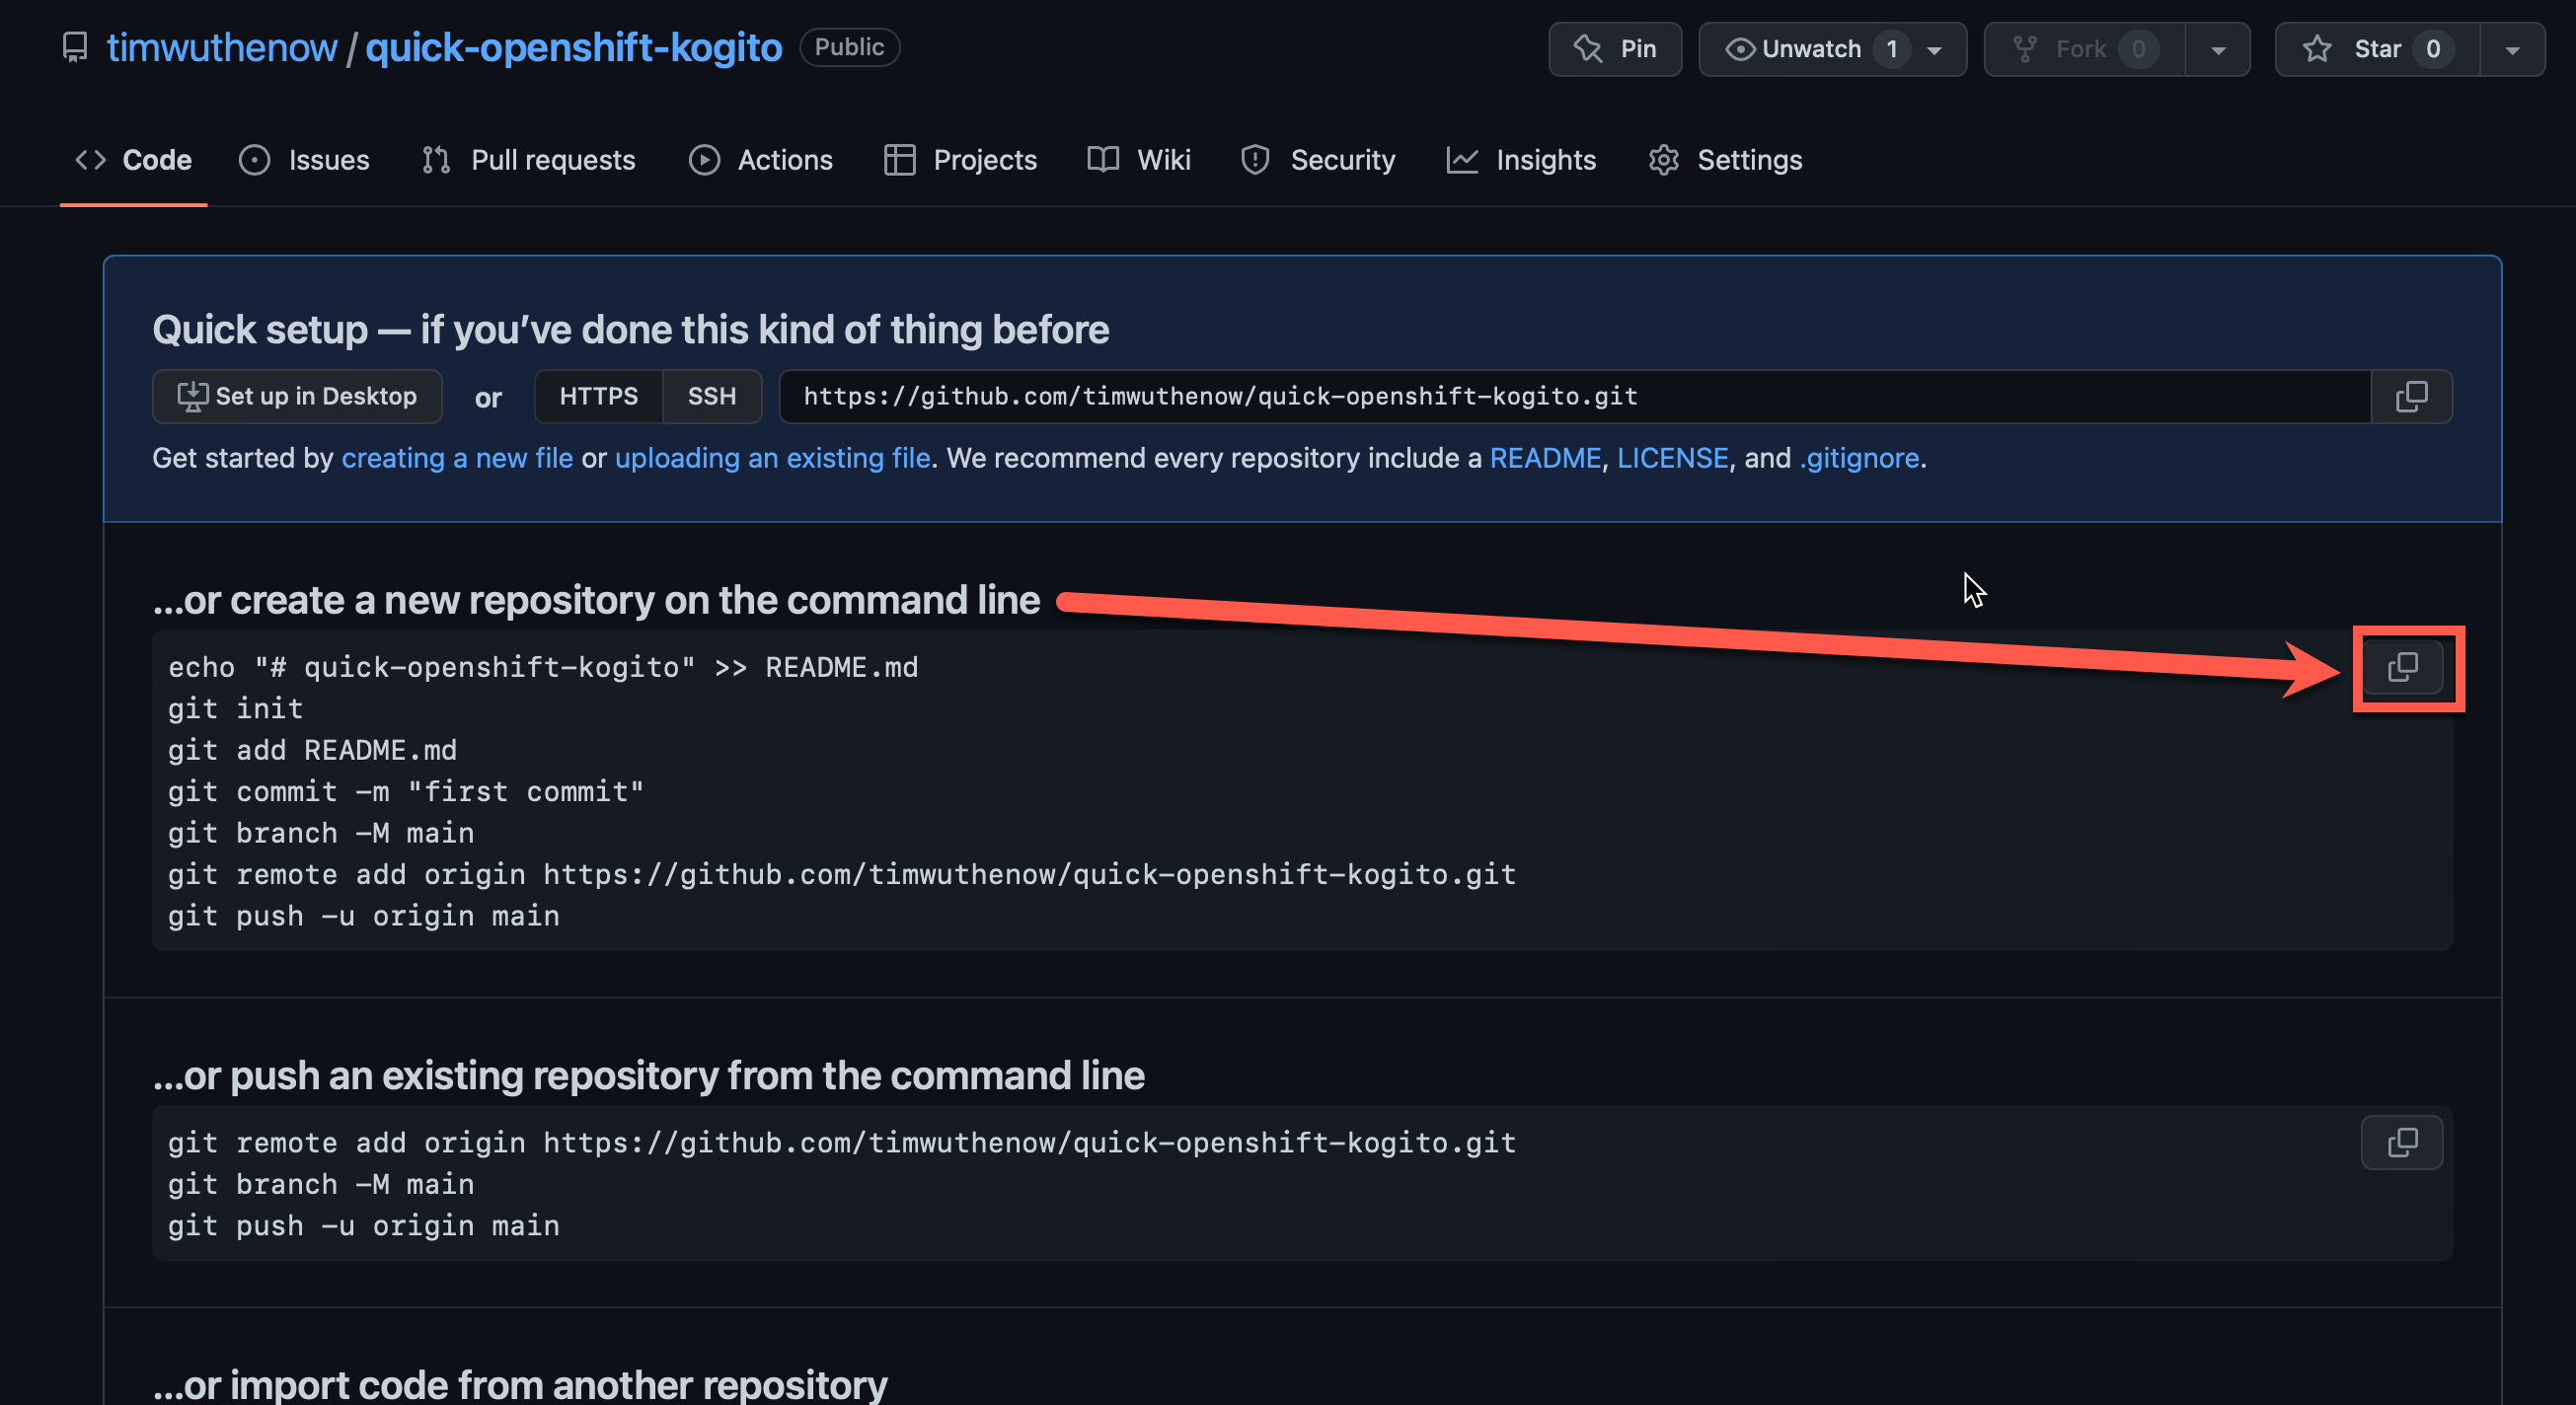
-
When this is done, you are finished with this section. Proceed to either deploying locally or deploying on OpenShift