9. Getting Started with Decision Model and Notation
This lab introduces you to the deployment of an existing Decision Model and Notation (DMN) and validation of it's decisions.
- Explore an existing DMN file created using IBM Business Automation Manager Canvas
- Test the DMN using IBM Business Automation Manager Canvas's Extended Services
- Deploy the existing DMN project to OpenShift
- Test the deployed DMN
9.1 Examine Existing DMN Diagram
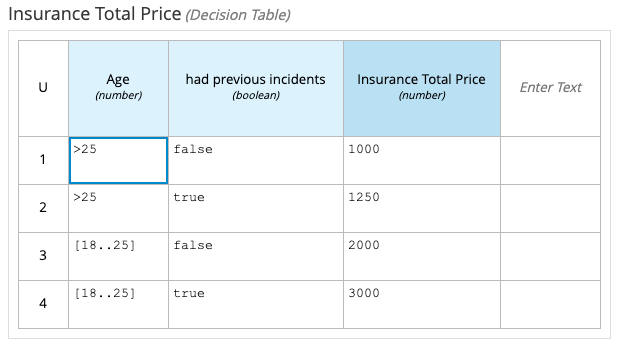
The following example describes an insurance price calculator based on an applicant’s age and accident history. This is a simple decision process based on the following decision table:
 |
|---|
| DMN Decision Table |
The decision table was designed with using a DMN editor, this could be done in IBM Business Automation Manager Canvas, VSCode, Business Central or realistically any DMN compatible design tool. With how IBM Business Automation Open Edition 9.0 utilizes the DMN specification, we're easily able to import this diagram seamlessly in the tool that makes the most sense for our end user.
Notice that:
-
The DMN decision table includes a hit policy, inputs, and outputs.
-
Unlike the classic Drools Rules Language (DRL) based decision tables that can be created in Business Central, input and output names in DMN decision tables accept spaces. This allows for more clarity in your decisions aligning more to a business acumen.
-
The conditions for the
Ageinput is defined using the Friendly Enough Expression Language (FEEL).
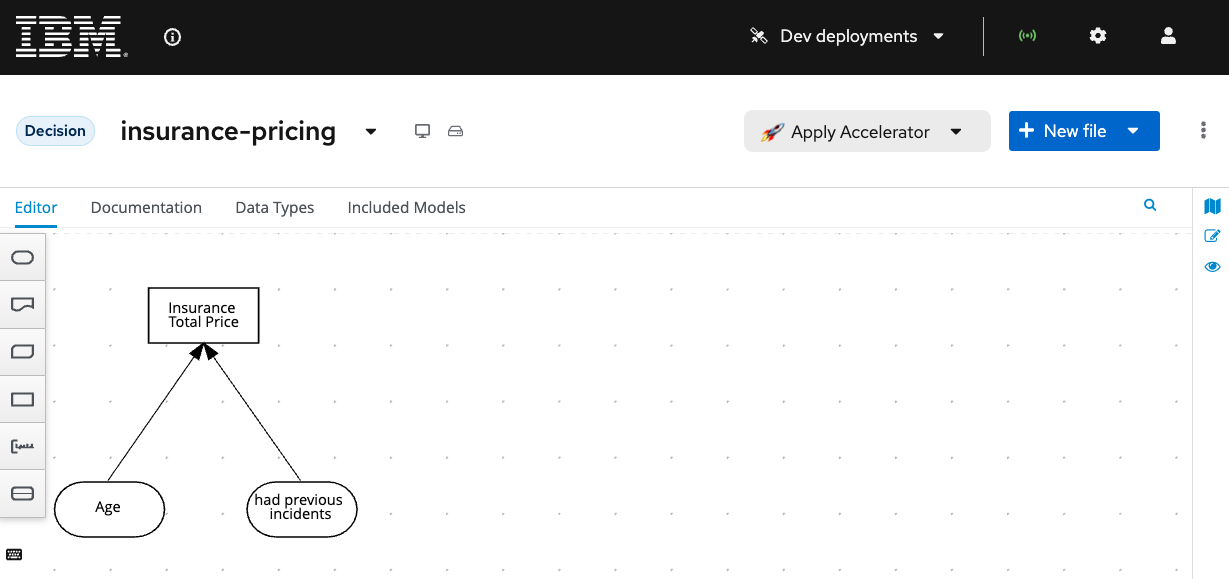
The decision can also be represented by the following decision requirements diagram:

In this decision requirements diagram, you may note that the applicant’s age and accident history are found in squared ovals, these indicate that these are the required inputs for the decision table "Insurance Total Price".
You can find the DMN component in the DMN GitHub repository.
9.2 Import the DMN File into IBM Business Automation Manager Canvas
In this section, you can import the GitHub repository to IBM Business Automation Manager Canvas directly from the file or clone the repository, if you do the direct file.
-
Open IBM Business Automation Manager Canvas by navigating to your instance of it (within the lab environments these are at http://localhost:9090/#. From here, you will copy the URL to the gist of the Insurance Pricing DMN located at this repository location.

-
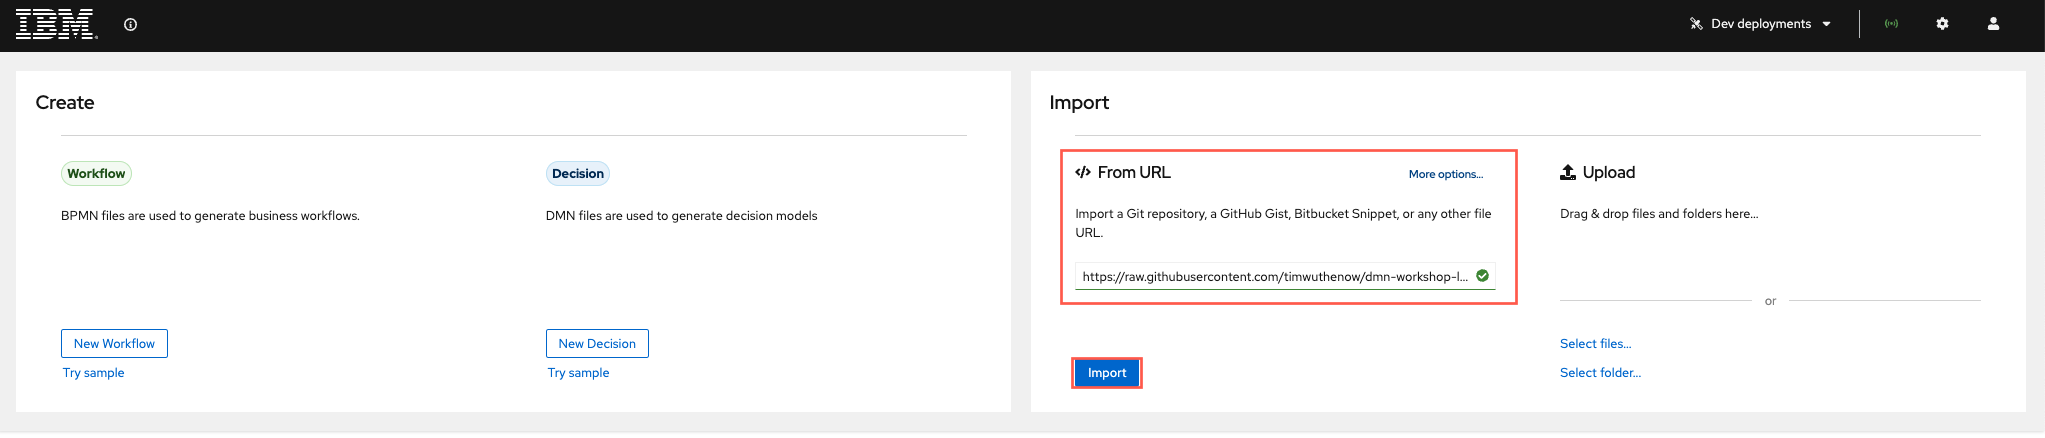
With this link navigate to the IBM Business Automation Manager Canvas and under Import From URL paste the link from the previous step and click Import.
-
When the project is imported, you will see the DMN Editor with the insurance-pricing DMN model displayed. If you instead of pointing to a particular DMN, pointed to an entire project, any DMN/BPMN models associated with it would be able to viewed/edited within IBM Business Automation Manager Canvas.
-
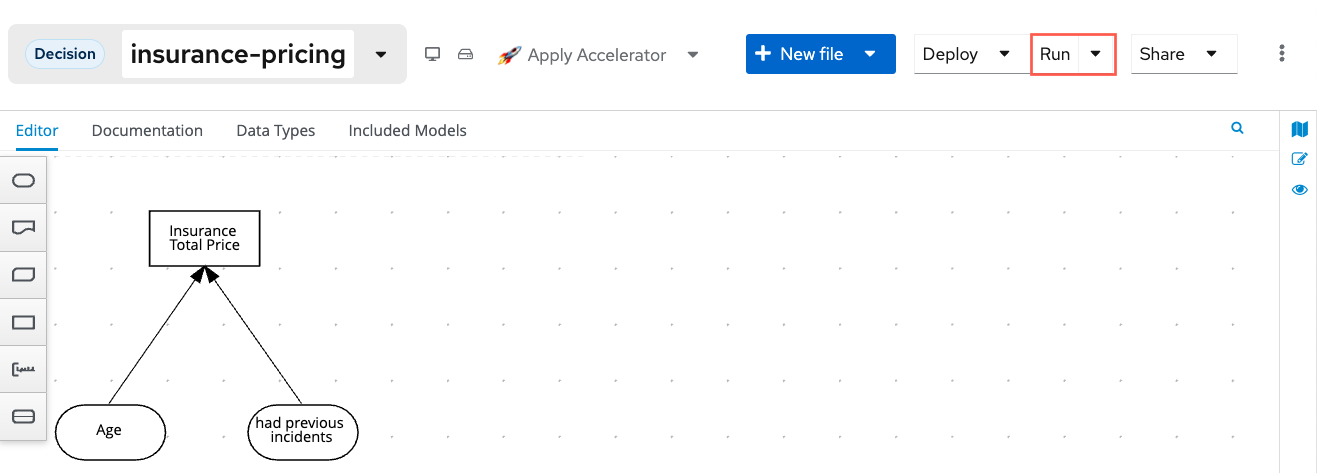
You can then click the Run button to get a local copy of this DMN running within the browser session itself. The best part about the DMN specification is that it is both a modeling specification, but also has an execution specification which allows for it to be as portable as it is.
-
This will have a section of the browser turn into a form and you can run the model right there. Modifying the checkbox based on the boolean of
had previous incidentsand set anAgebased on the data type being a number.Info
Within this form you may see that if you just put an age in that the result returns (null). This is because the way that a typical form works when generated is that a non-checked box assumes null, which the rules by default do not check for null. To quickly get around this from the form you can check and uncheck the checkbox and move forward with your testing. This initializes the value, this is because the form when it sends it for initial execution has the boolean value as a null. How would you address this in the rules? HINT: since we're checking if the number of incidents has a checkbox or not, you can write it as
? = false or ? = null. Why the?? This is a way that DMN through the Friendly Enough Expression Language uses the column header object that you're testing to simplify checking a variable against a condition!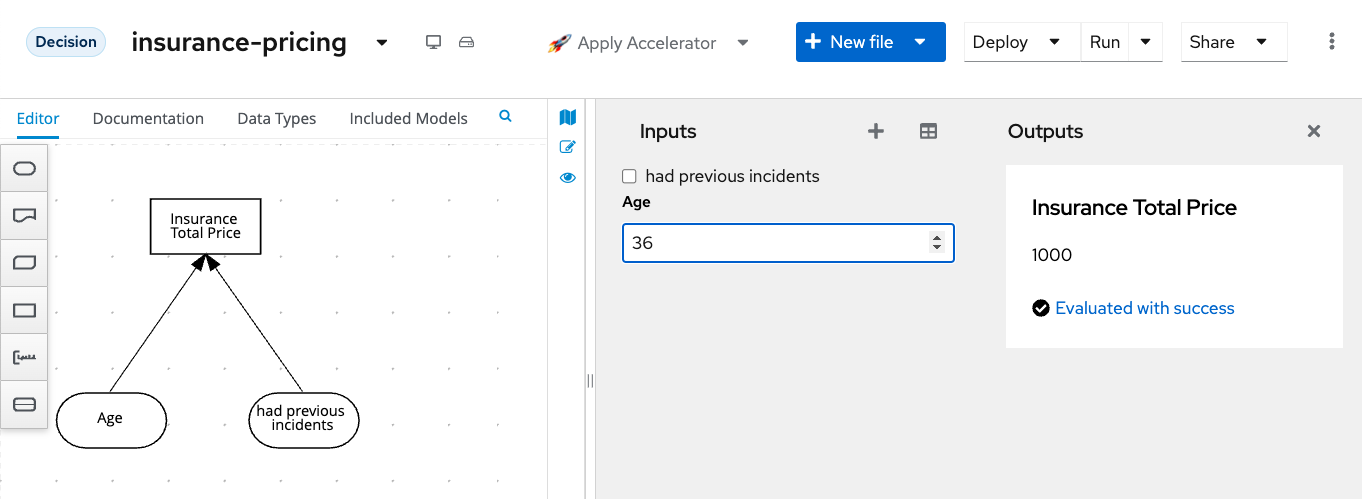
-
This service can be deployed as a sample Quarkus service to OpenShift right away as a sample service that you can invoke immediately. In the next section we will show how this is done from a development point of view.
9.3 Deploying this sample service to OpenShift
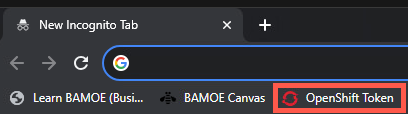
If you are using the provided lab environment for TechXchange, the environment itself provides access to a shared cluster for all attendees to login to OpenShift there is a bookmark in Chrome called OpenShift Token that will take you to a login page to create an OpenShift login token. Every user for the TechXchange environment has a created namespace to the student id that was given to your workstation at the start of the lab (student01 through student20 with the namespace to that username with -namespace). The password for all of these instances is Passw0rd.
-
To create the OpenShift token to connect to the console at the bookmarked link OpenShift Token from Chrome.
-
From here you will login to OpenShift using your username and password created for the lab which is of the format
student01throughstudent20with passwordPassw0rd. If you get security issues with the link, accept them using the Advanced option in Chrome to proceed to the login screen.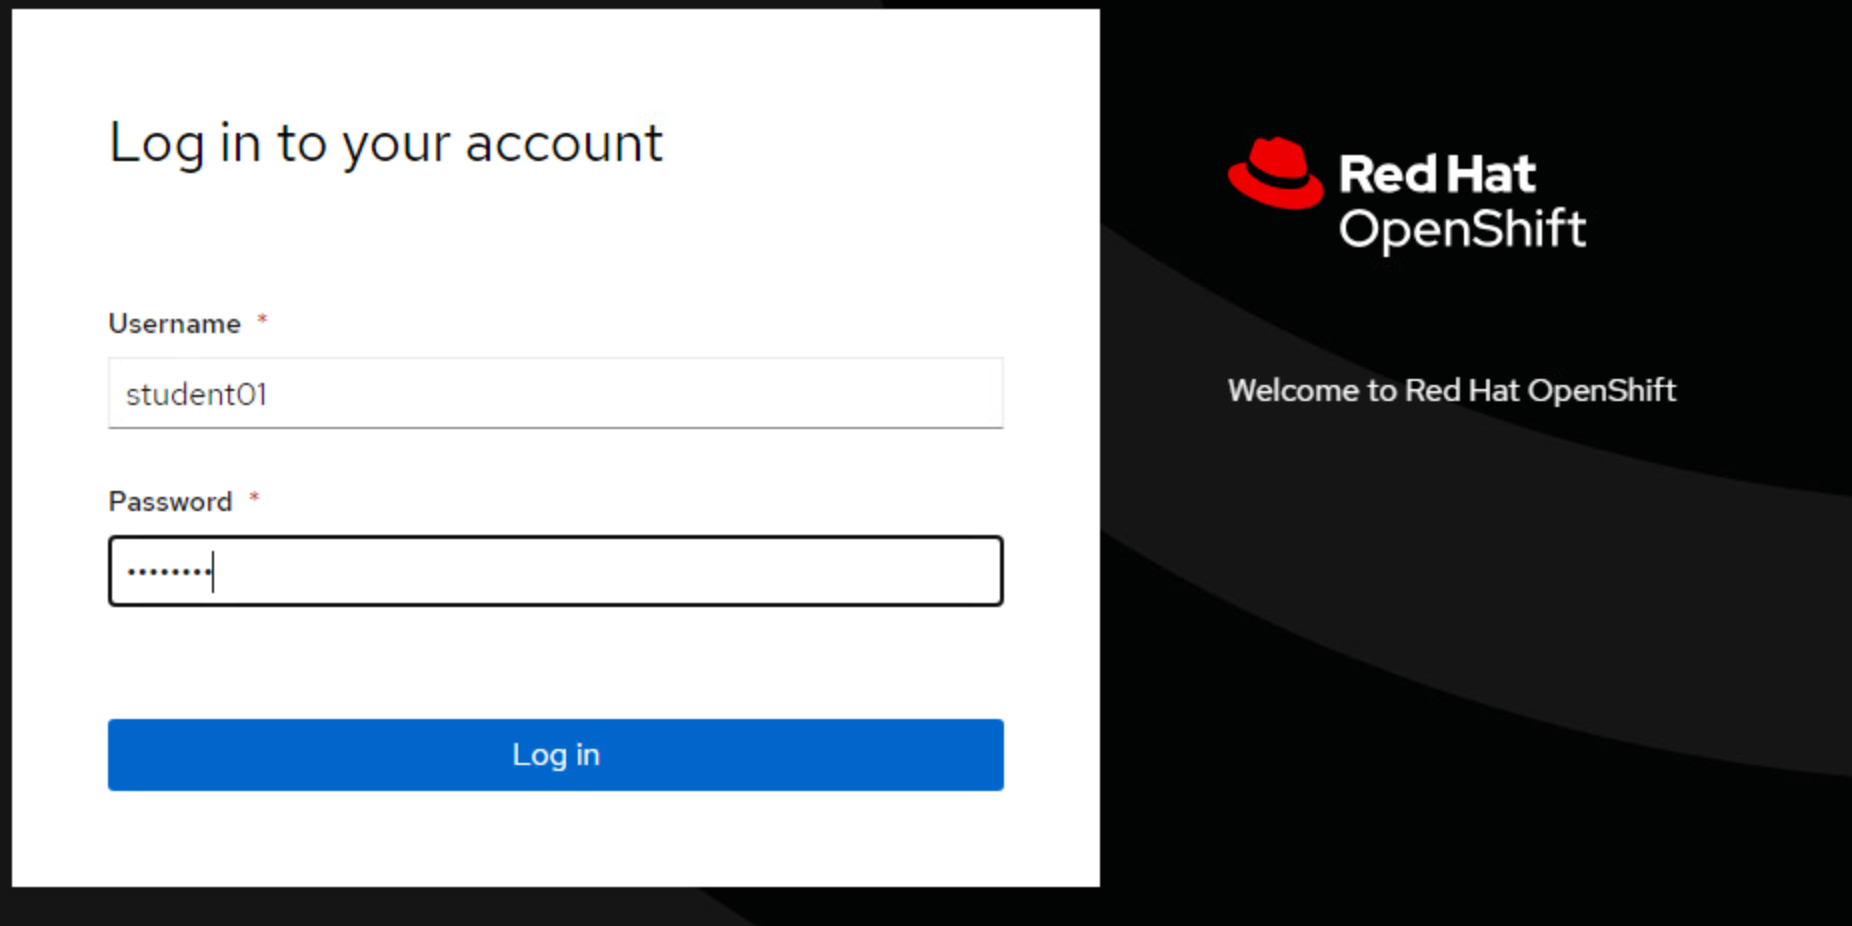
-
After logging in to the token screen, you will need to copy the token, server and use your assigned namespace (
student##-namespace) to login. Please be sure to check theInsecurely disable TLS certificate validationas this is a local instance of OpenShift and does not have all the proper certificates in place.
-
After you're successfully connected, you can use the deploy feature found on IBM Business Automation Manager Canvas by clicking the
Deploybutton and selecting theinsurance-pricingdecision to deploy. Confirm to deploy it to your namespace and let it load for approximately 30-45 seconds after. Then you can click the link to load the Quarkus service that was created from the DMN file. Just a note you need to click the checkbox forhad previous incidentsto initialize the value.
9.4 Conclusion
Congratulations, you've finished the first part of the DMN exercise. Next, you will have an intermediate level exercise that will guide you through the implementation, deployment and testing of the Vacation Days use case.